
The Admin page allows you to manage service settings within your workspace.

The Admin page allows workspace Admins to manage service-related settings, including user accounts, registered vessels, and custom monitoring areas within the workspace.
Only users with Admin privileges can access and manage this page.
Workspace
This page allows Admin to view and manage workspace information and configure settings that are applied across the platform.
1. General Information
•
View and update the workspace's basic information.
2. Default Map Settings
•
Configure the default map style used throughout the platform.
3. Default Icon Settings
•
Configure the icon style displayed on the map.
4. Layer Options
•
Configure the maritime zone layers displayed on the map.
5. Line Options
•
Configure the color and thickness of Past Track and Route lines displayed on the map.
6. Vessel Filter Settings
•
Manage the vessel categories available within the workspace.
7. Port Filter Settings
•
Manage the port categories available within the workspace.
User
This page allows Admins to view and manage user accounts within the workspace.

Admin > User
1. Status
•
All : View all user accounts
•
Active : View active user accounts
•
Blocked : View blocked user accounts
•
Expired : View expired user accounts
•
Deleted : View deleted user accounts
2. Search Bar
•
Users can be searched by Name or Email.
3. Add User
•
Admins can register new users.
4. Name
•
Click to view and edit the user’s detailed information.
Ship Management
This page enables Admins to view, add, and delete vessels within the workspace fleet
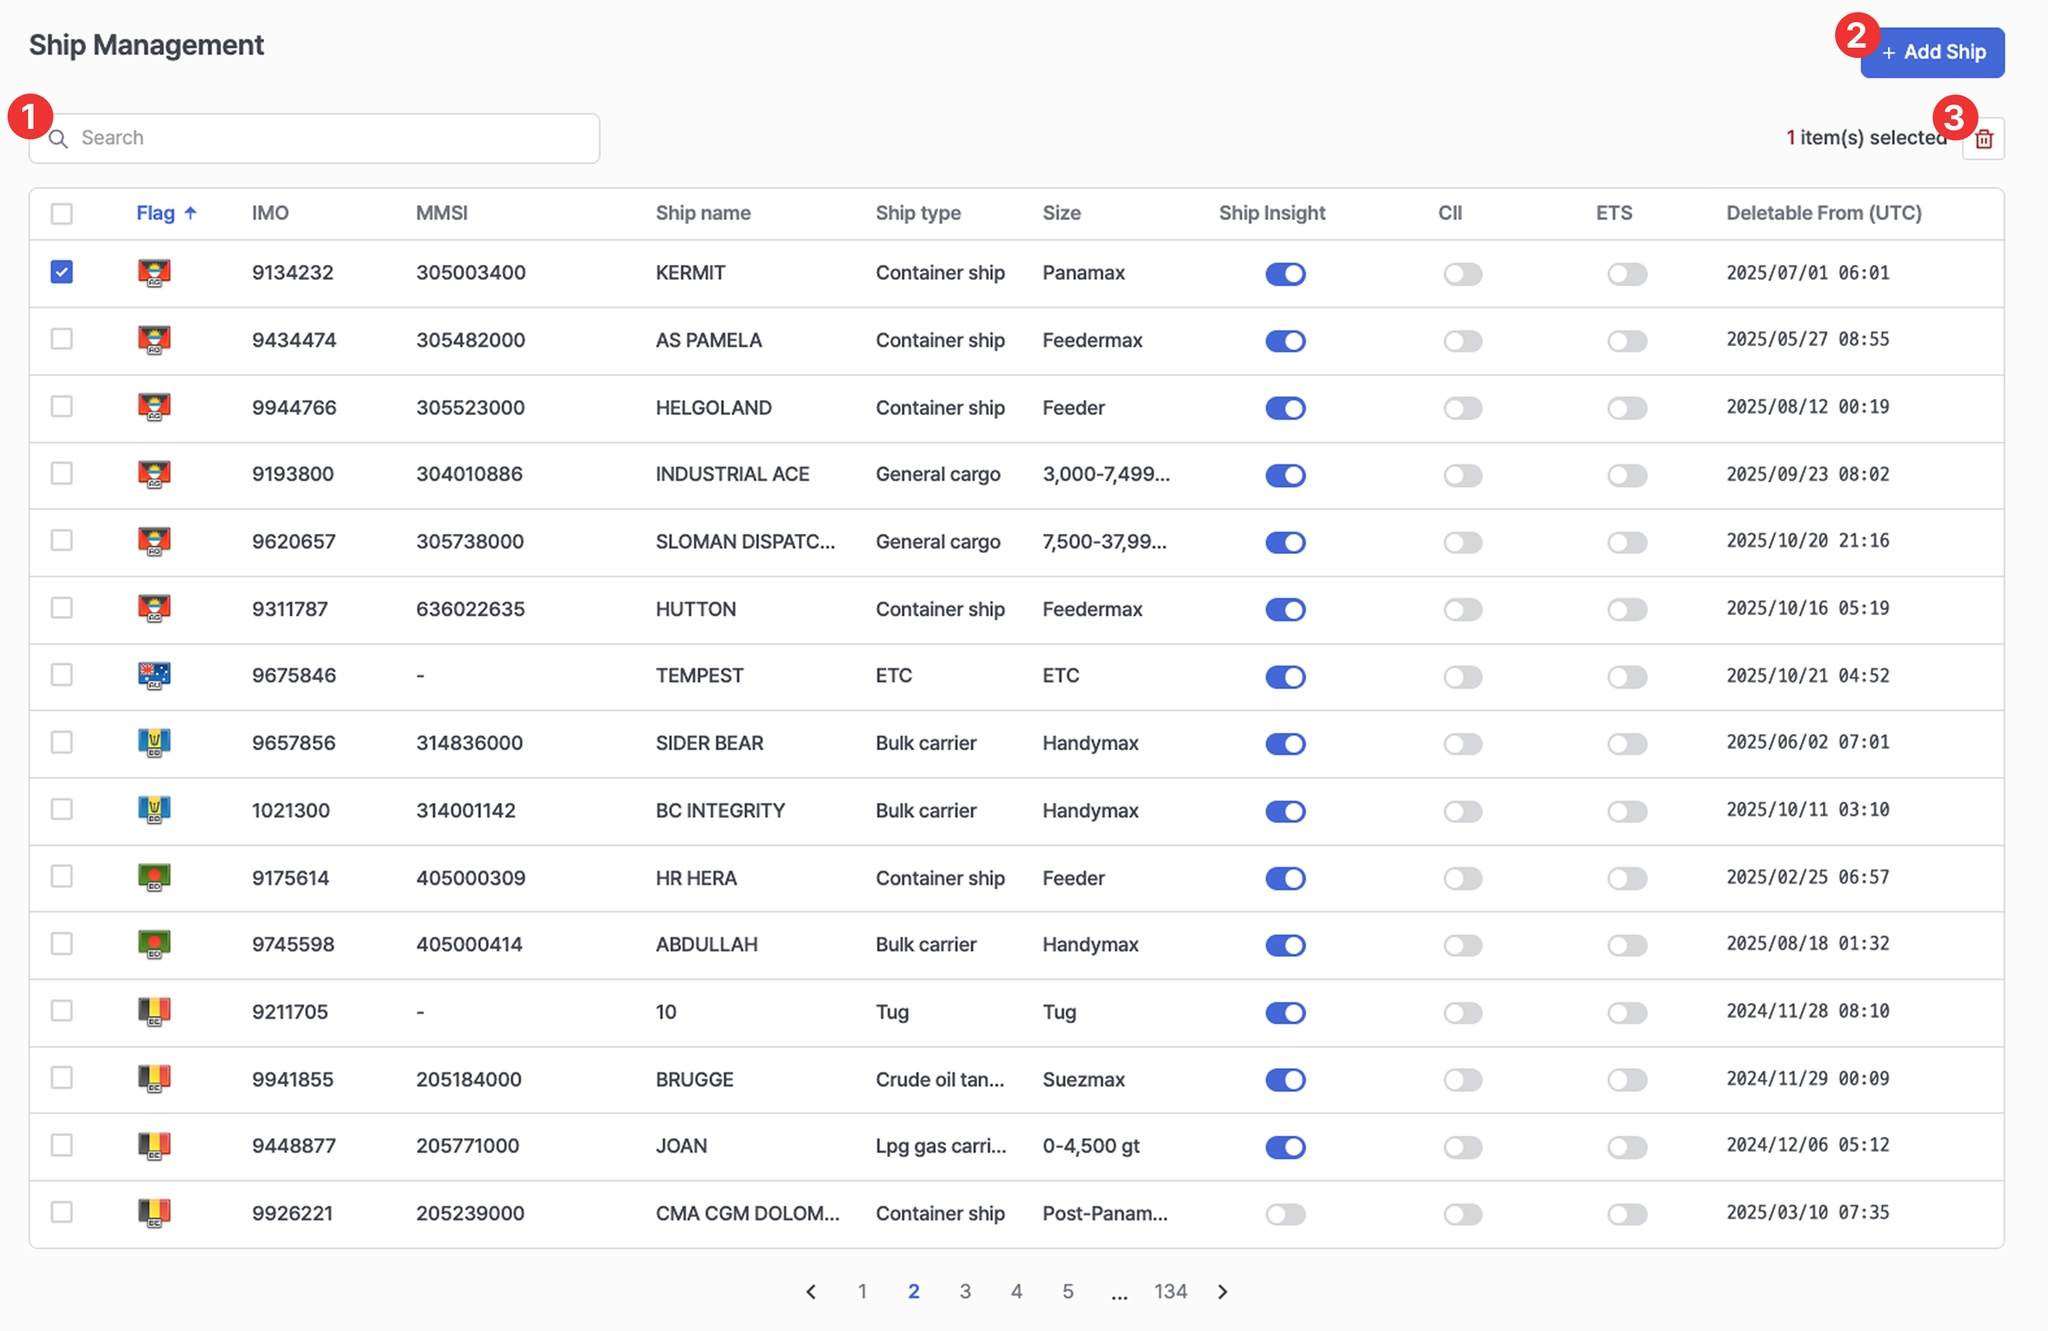
Admin > Ship Management
1. Search Bar
•
Quickly search for registered vessels by vessel name, IMO, or MMSI.
2. Add Ship
•
Register a new vessel in your workspace so that it can be viewed by all users within the same workspace.
3. Delete Ship
•
Click a vessel from the vessel list to delete it.
•
Deletion is only possible 7 days after the vessel has been registered. The Deletable From (UTC) date indicates when the vessel becomes eligible for deletion. Once that date has passed, the vessel can be selected and removed.
Notes
•
Ship Management is available only to users subscribed to the Ship Insight service.
Custom Areas
This page allows Admins to create and manage custom geographic areas on the map.
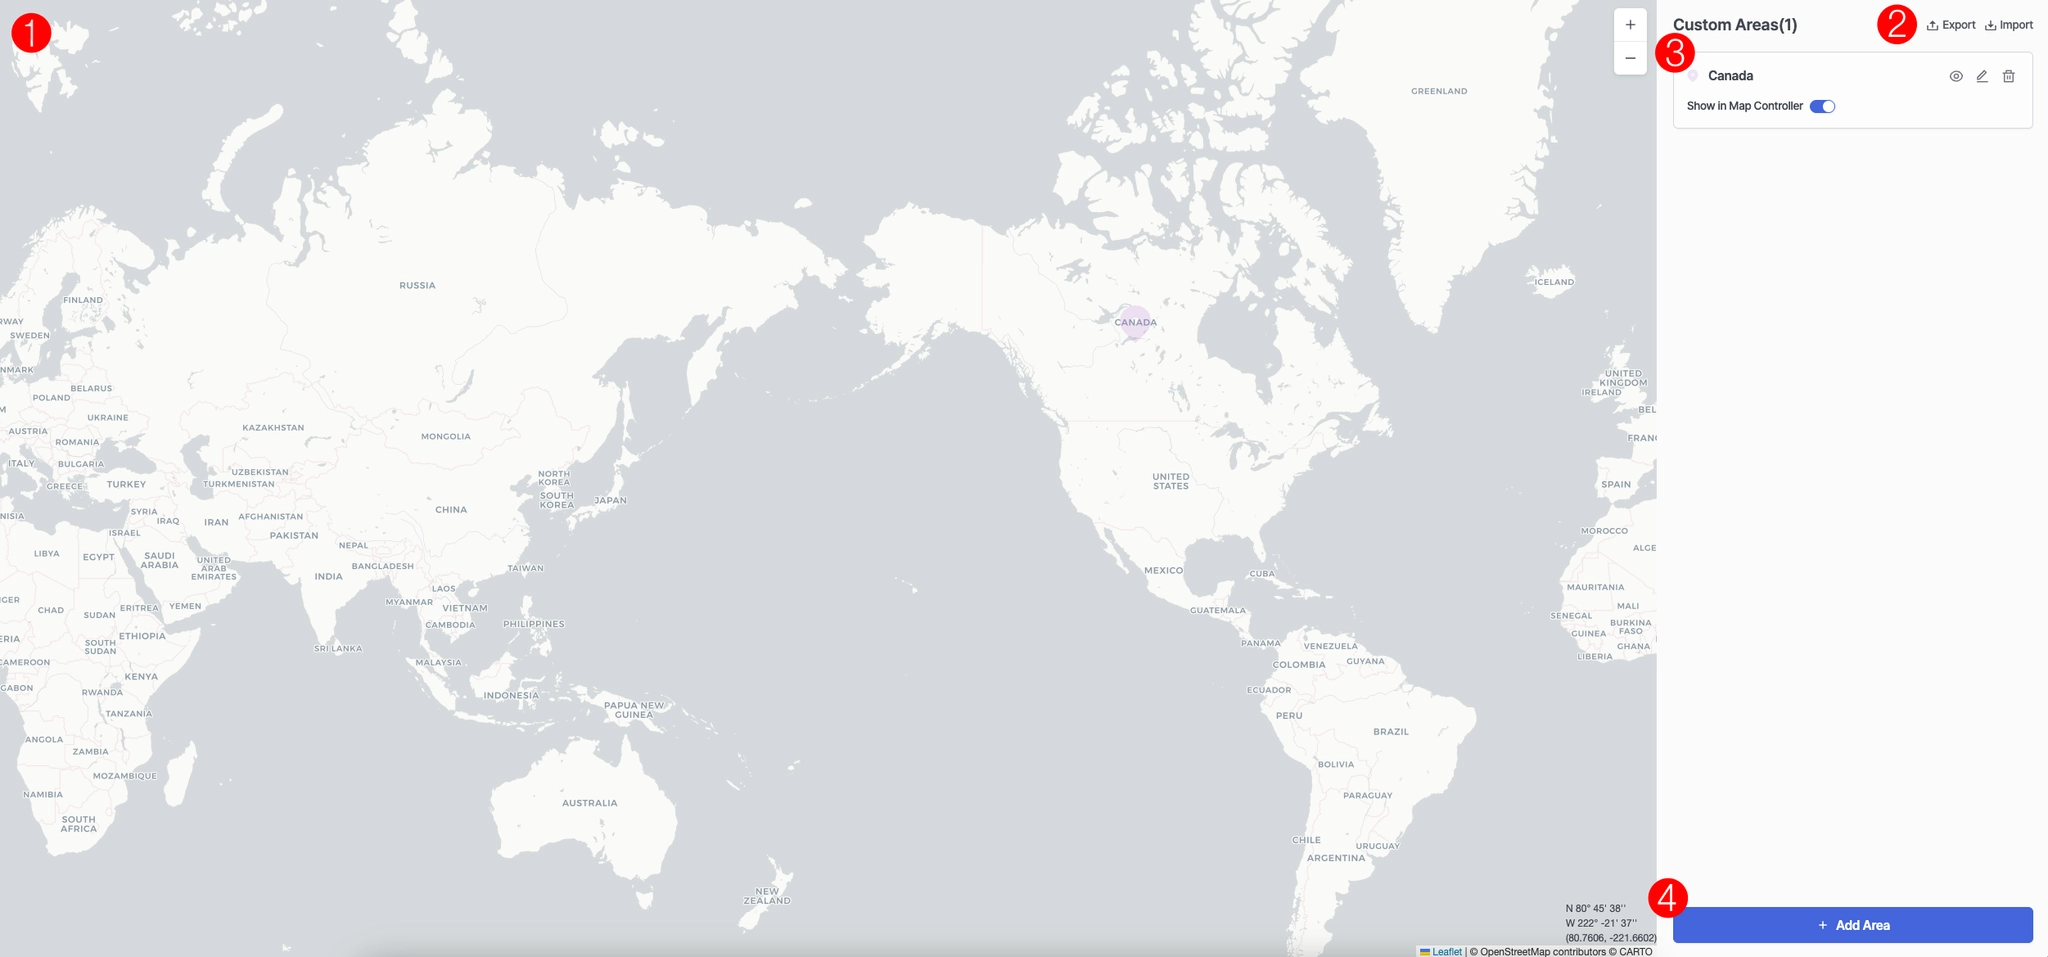
Admin > Custom Area
1. Map View
•
View custom areas that have been created on the map.
2. Export / Import
•
Export existing custom area information or import custom areas in bulk.
3. Custom Areas List
•
Show in Map Controller : Configure whether the custom area is displayed in the Map Controller.
•
View Icon : Display the custom area on the map.
•
Edit : Modify the custom area information.
•
Delete Icon : Remove the custom area.
4. Add Area
•
Create a new custom area.
.png&blockId=36d4a58b-3010-8080-9ed5-fc33edfbae5d)