


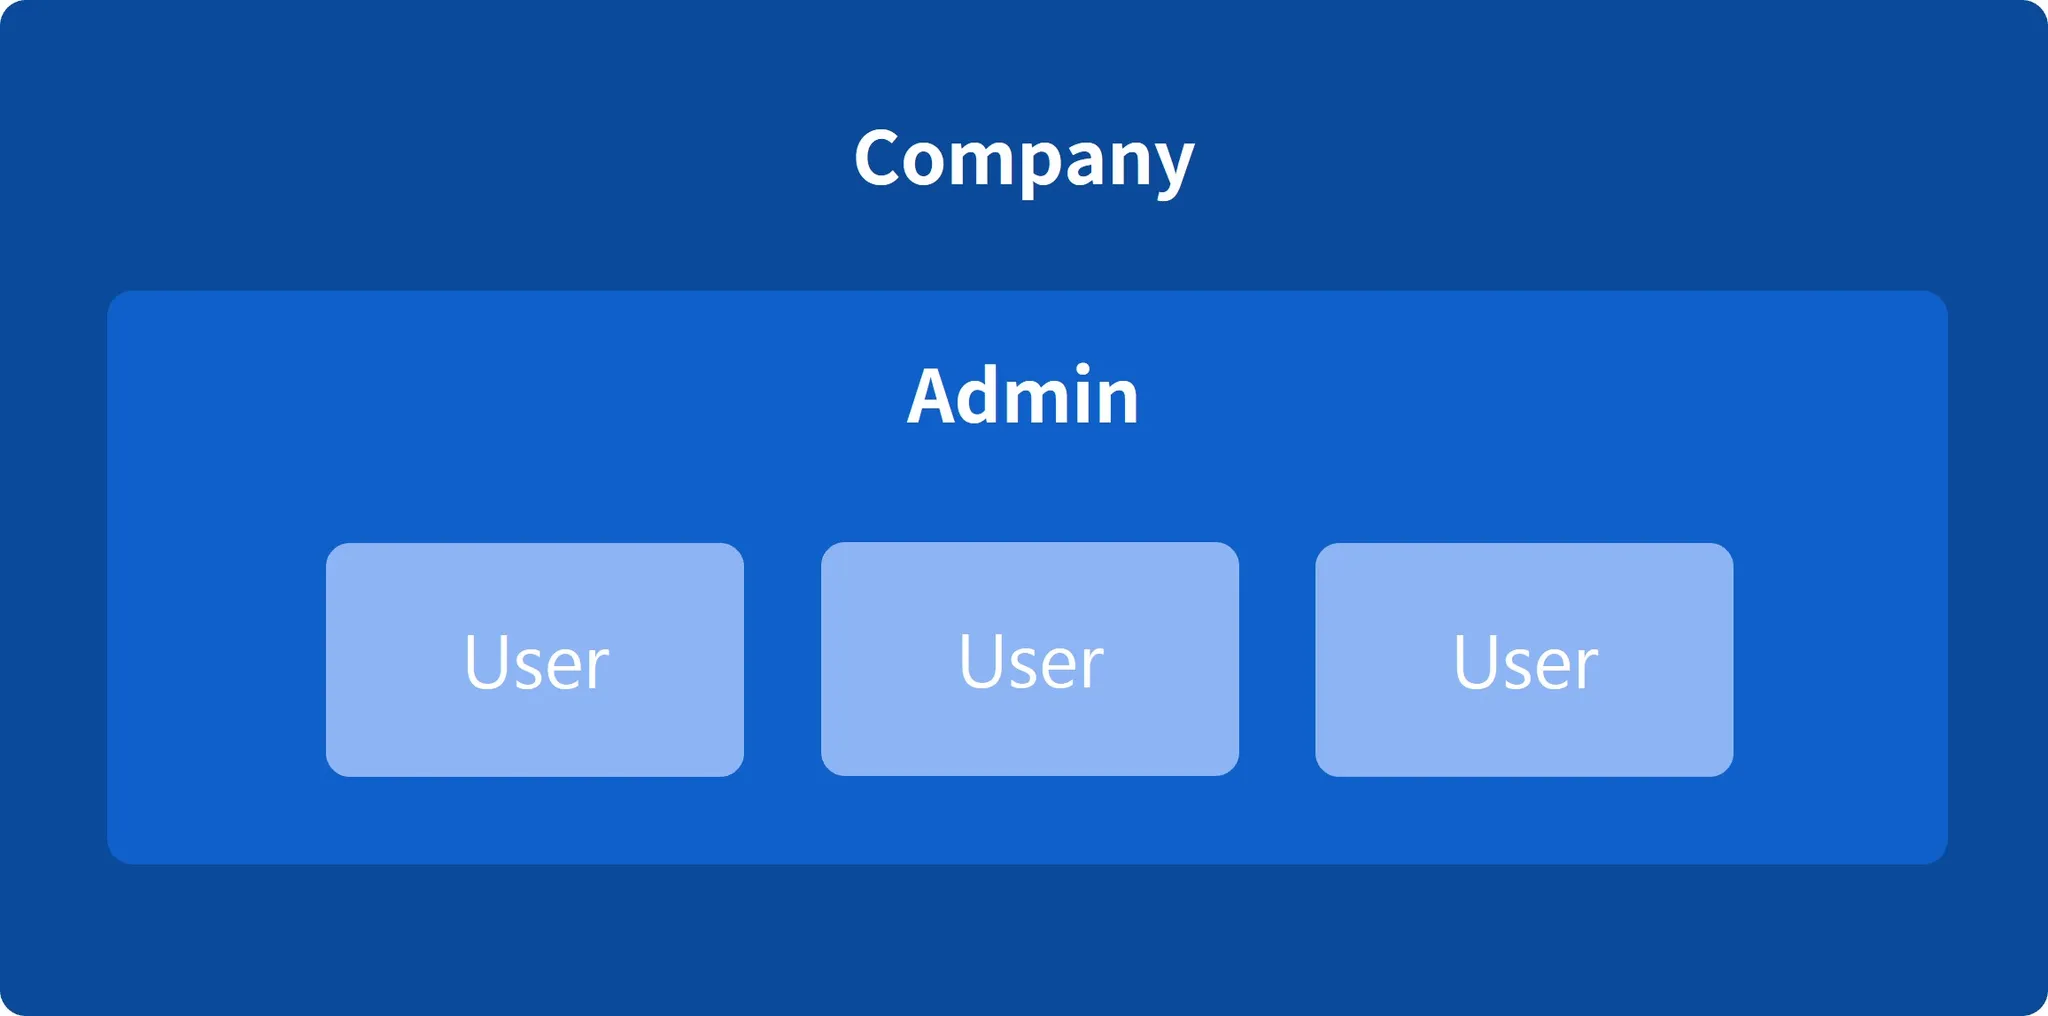
Hierarchy and Roles
•
Company: All accounts are associated with a company.
•
Admin: Admins have the ability to manage various settings, including adding users, registering company ships, and more.
•
User : General users with standard access to platform features.
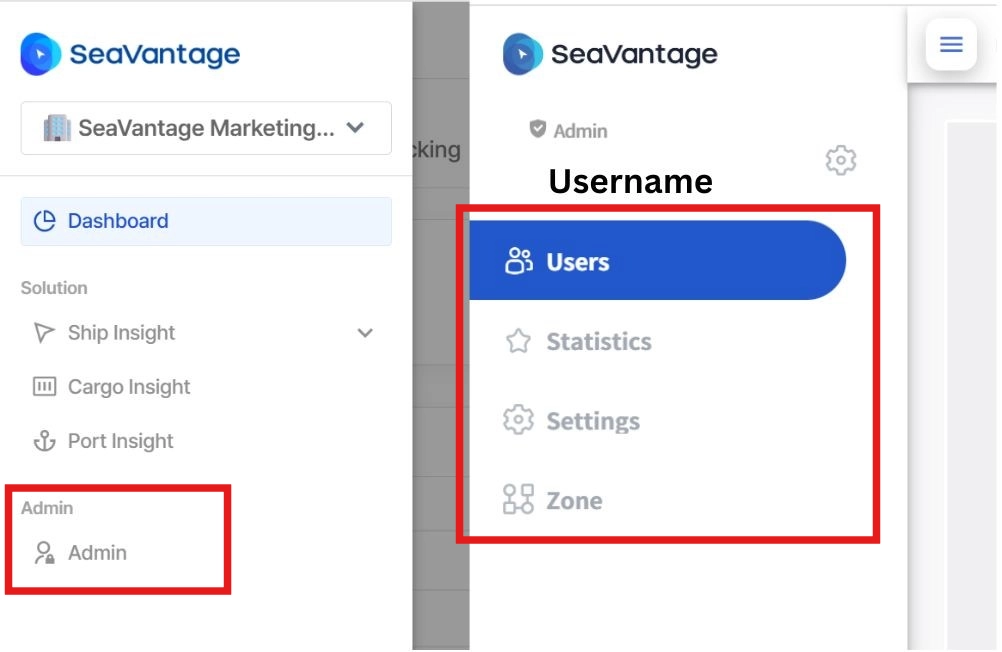
Admin Page
•
Click on the menu button on the top left
•
Click on the ‘Admin’ menu
◦
There are four Admin menus:
▪
User
▪
Statistics
▪
Settings
▪
Zone
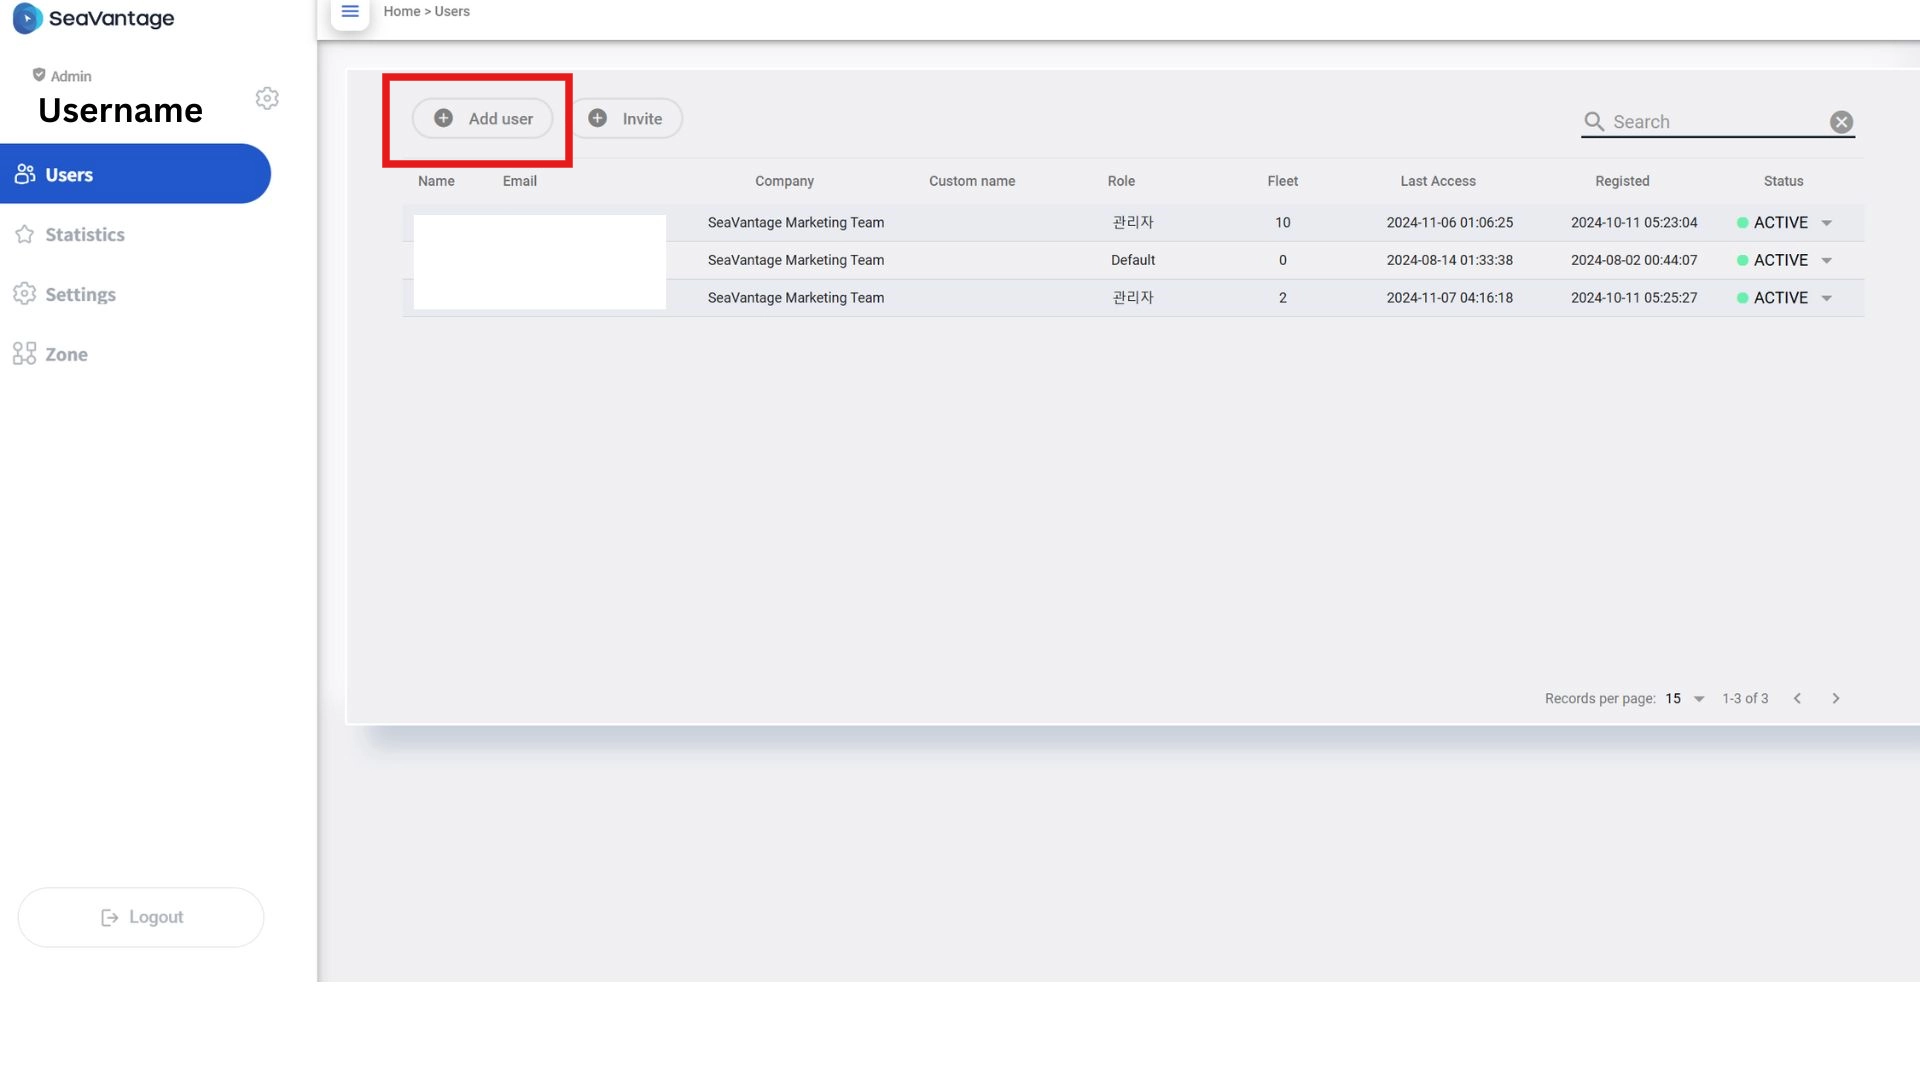
User
On the Admin page, click the Users menu to see a list of users.
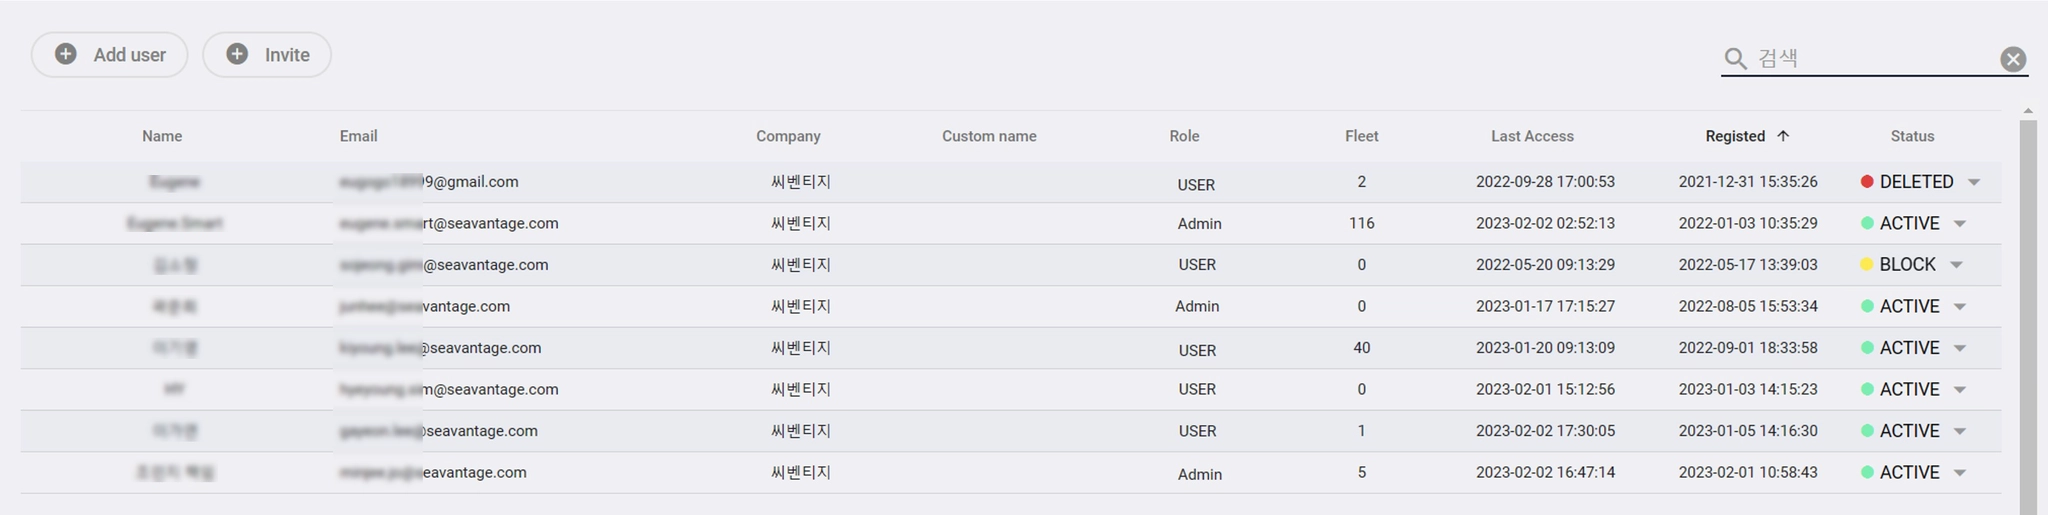
You can view the following details per user:
Item | Contents |
Name | Username (can be changed) |
Email | SVMP login account - email address |
Company | Shows the company name set in settings |
Role | Shows the role of each user |
Fleet | Number of fleets registered per user |
Last Access | Most recent time the user accessed the platform |
Registered | Date of registration per user |
Status | View and modify account statuses per user. Available statuses include: ACTIVE: User is active and has full permitted access BLOCK: User is temporarily blocked from access DELETED: User account is removed from the platform |
Add a User
Option 1: Adding Users Directly as an Admin
1.
Click on the ‘Add User’ button.
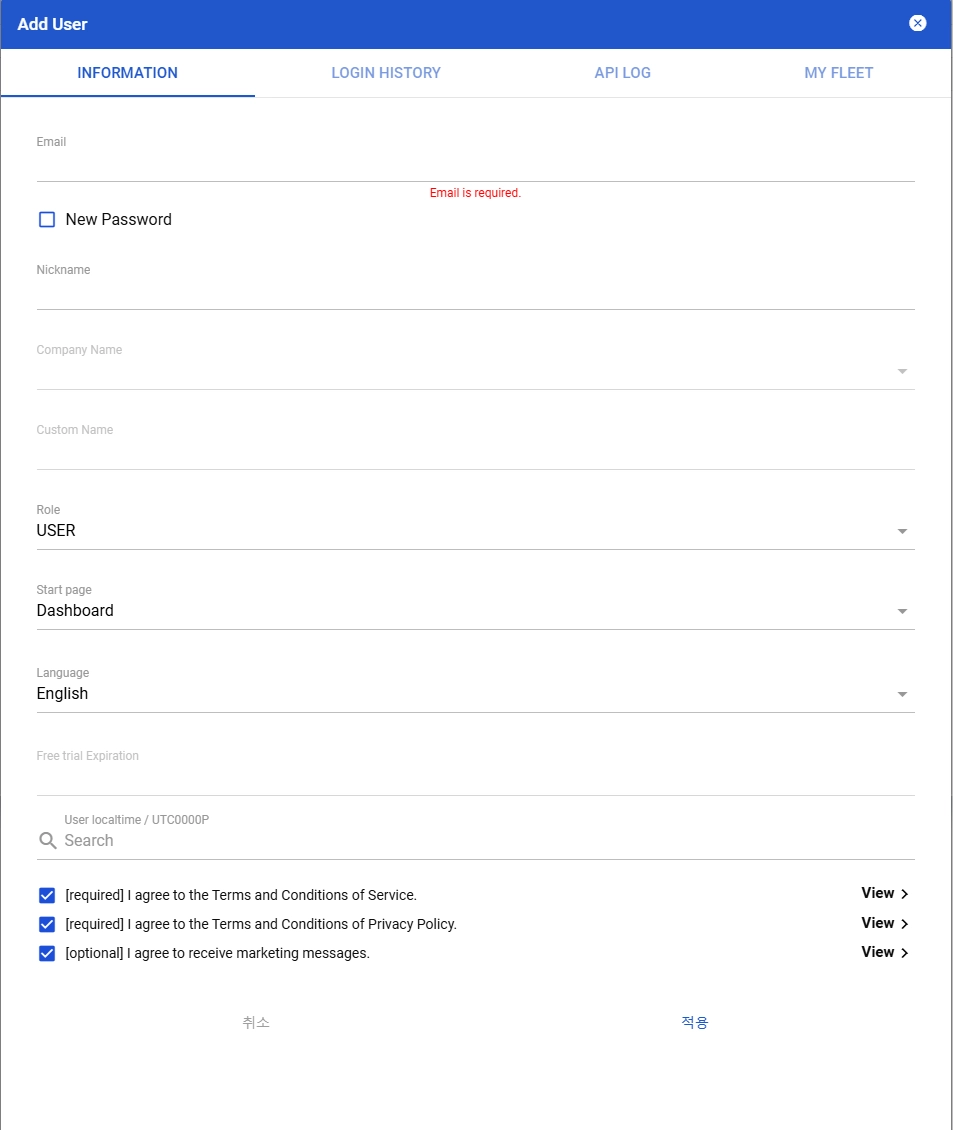
2.
Add a user by specifying the email address, nickname, password (tick new password), role, and language to use.
Option 2: Inviting Users as an Admin
1.
Click on the ‘Invite’ button on the top left (right beside +Add user)
2.
Enter the role, email address and language to invite.
.jpg&blockId=1374a58b-3010-806f-805c-c12dec472080)
Statistics
The Statistics menu offers an overview of key metrics, including the total number of registered and contracted ships, ports and B/L.
.jpg&blockId=1374a58b-3010-80cf-a336-d312f8de6bf4)
Item | Description | Category |
Ships registered | Total number of vessels registered across all accounts in the company (including vessels set in the "Vessel" menu) | Ship Insight |
Ships in contract | Total number of vessels that are currently under contract, including those listed under the vessel menu | Ship Insight |
Ports registered | Total number of ports currently registered under the company | Port Insight |
Ports in contract | Total number of ports that are currently under contract | Port Insight |
B/L registered | Total number of Master B/Ls currently registered under the company | Cargo Insight |
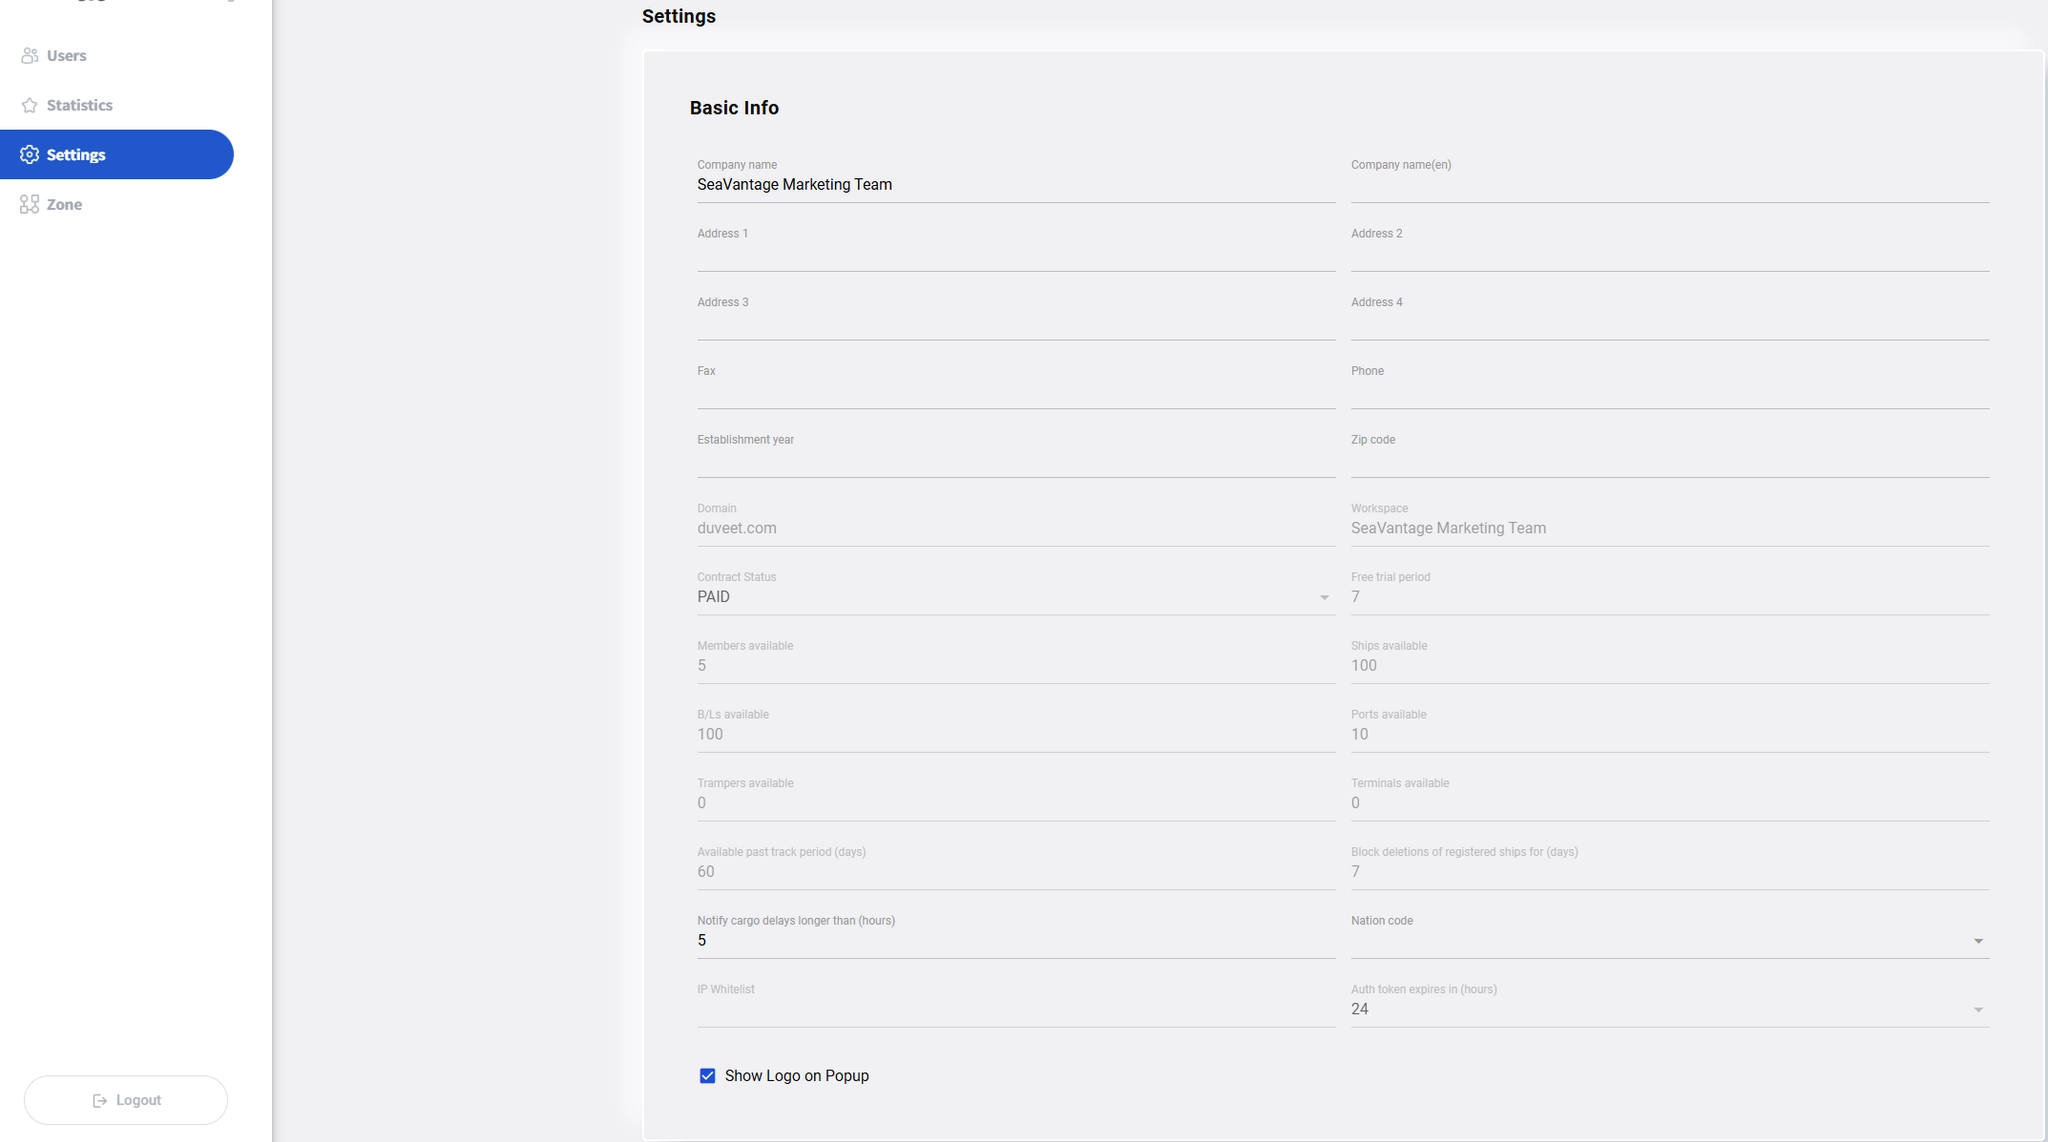
Settings
Company Settings
View and edit your company’s basic information.
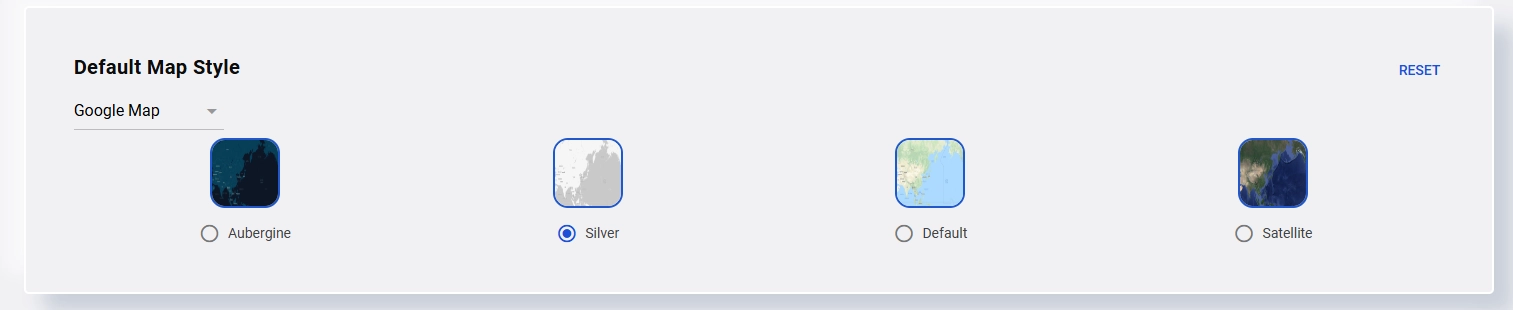
Default Map Style
Specify the default map style that appears on the map.
Default Icon Style
Specify the default ship icon that appears on the map.

Layer Options
Set the zone and line colors for the Emission Control Area (ECA), Exclusive Economic Zone (EEZ), Joint War Committee (JWC), and High Risk Area (HRA) shown on the map.

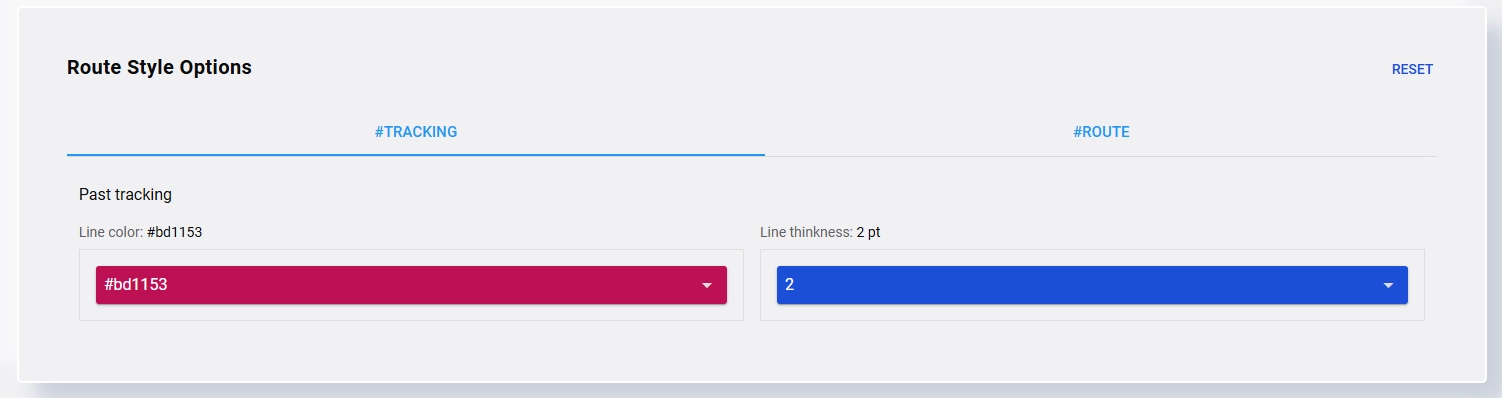
Routing Line Options
Set the line color and thickness of the tracking and route lines displayed on the map.
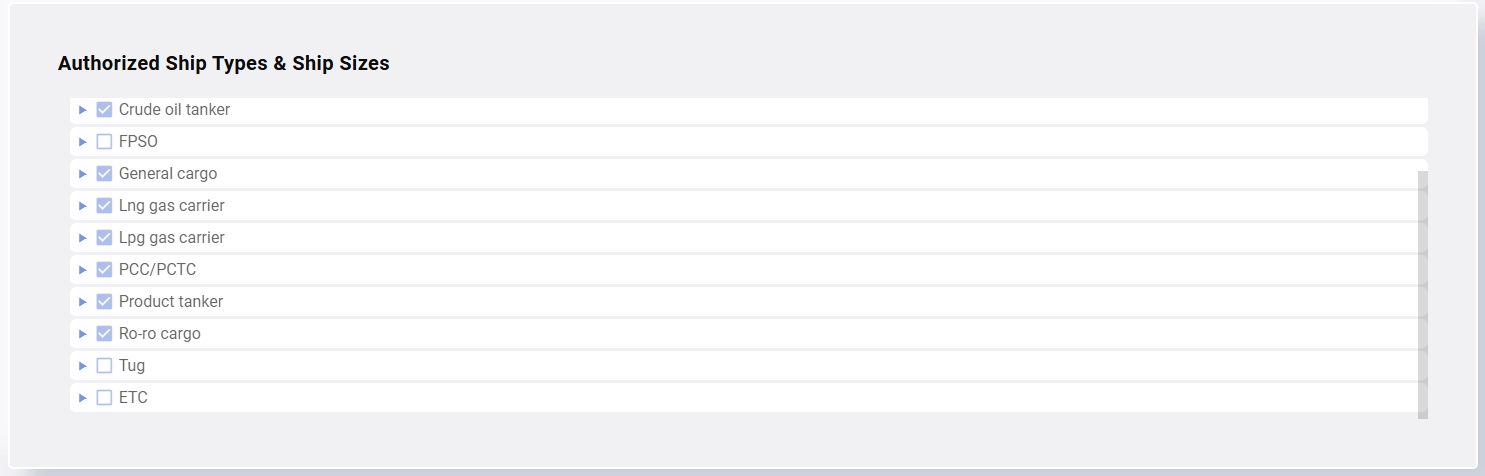
Authorized Ship Types & Ship Sizes
View available ship types for route prediction.
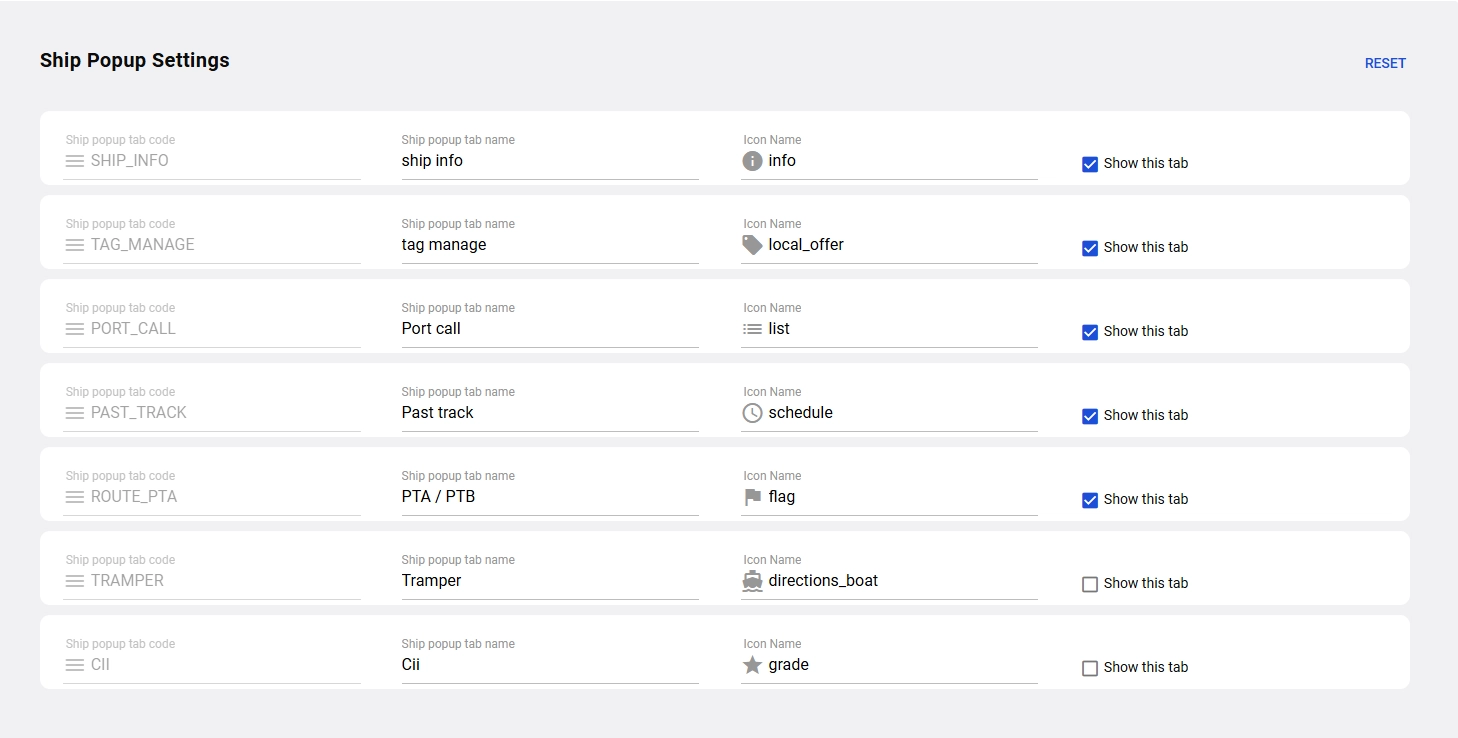
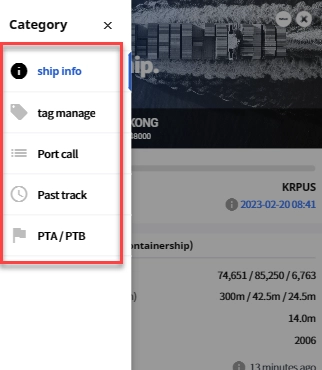
Ship Pop-up Settings
Choose which tabs or information to display in the ship pop-up by selecting "Show this tab.”
Cargo Actual Time Data Source
Select whether you want to receive the actual time data source from SeaVantage or from carriers.

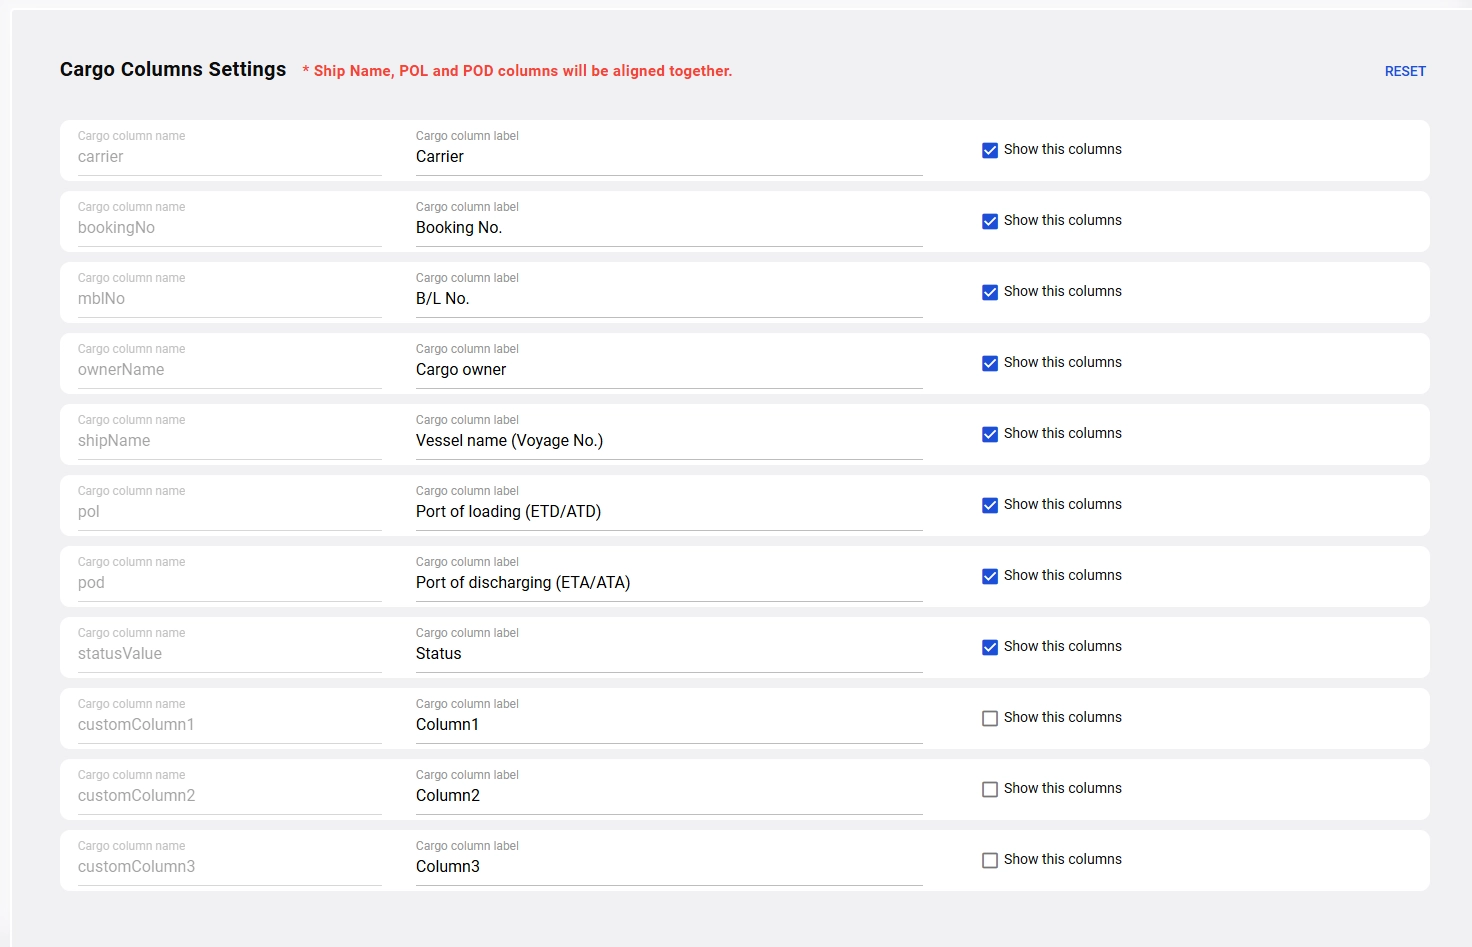
Cargo Columns Settings
Customize the information displayed in the B/L list table (as seen below) in Cargo Insight and arrange the order of items to suit your preferences.
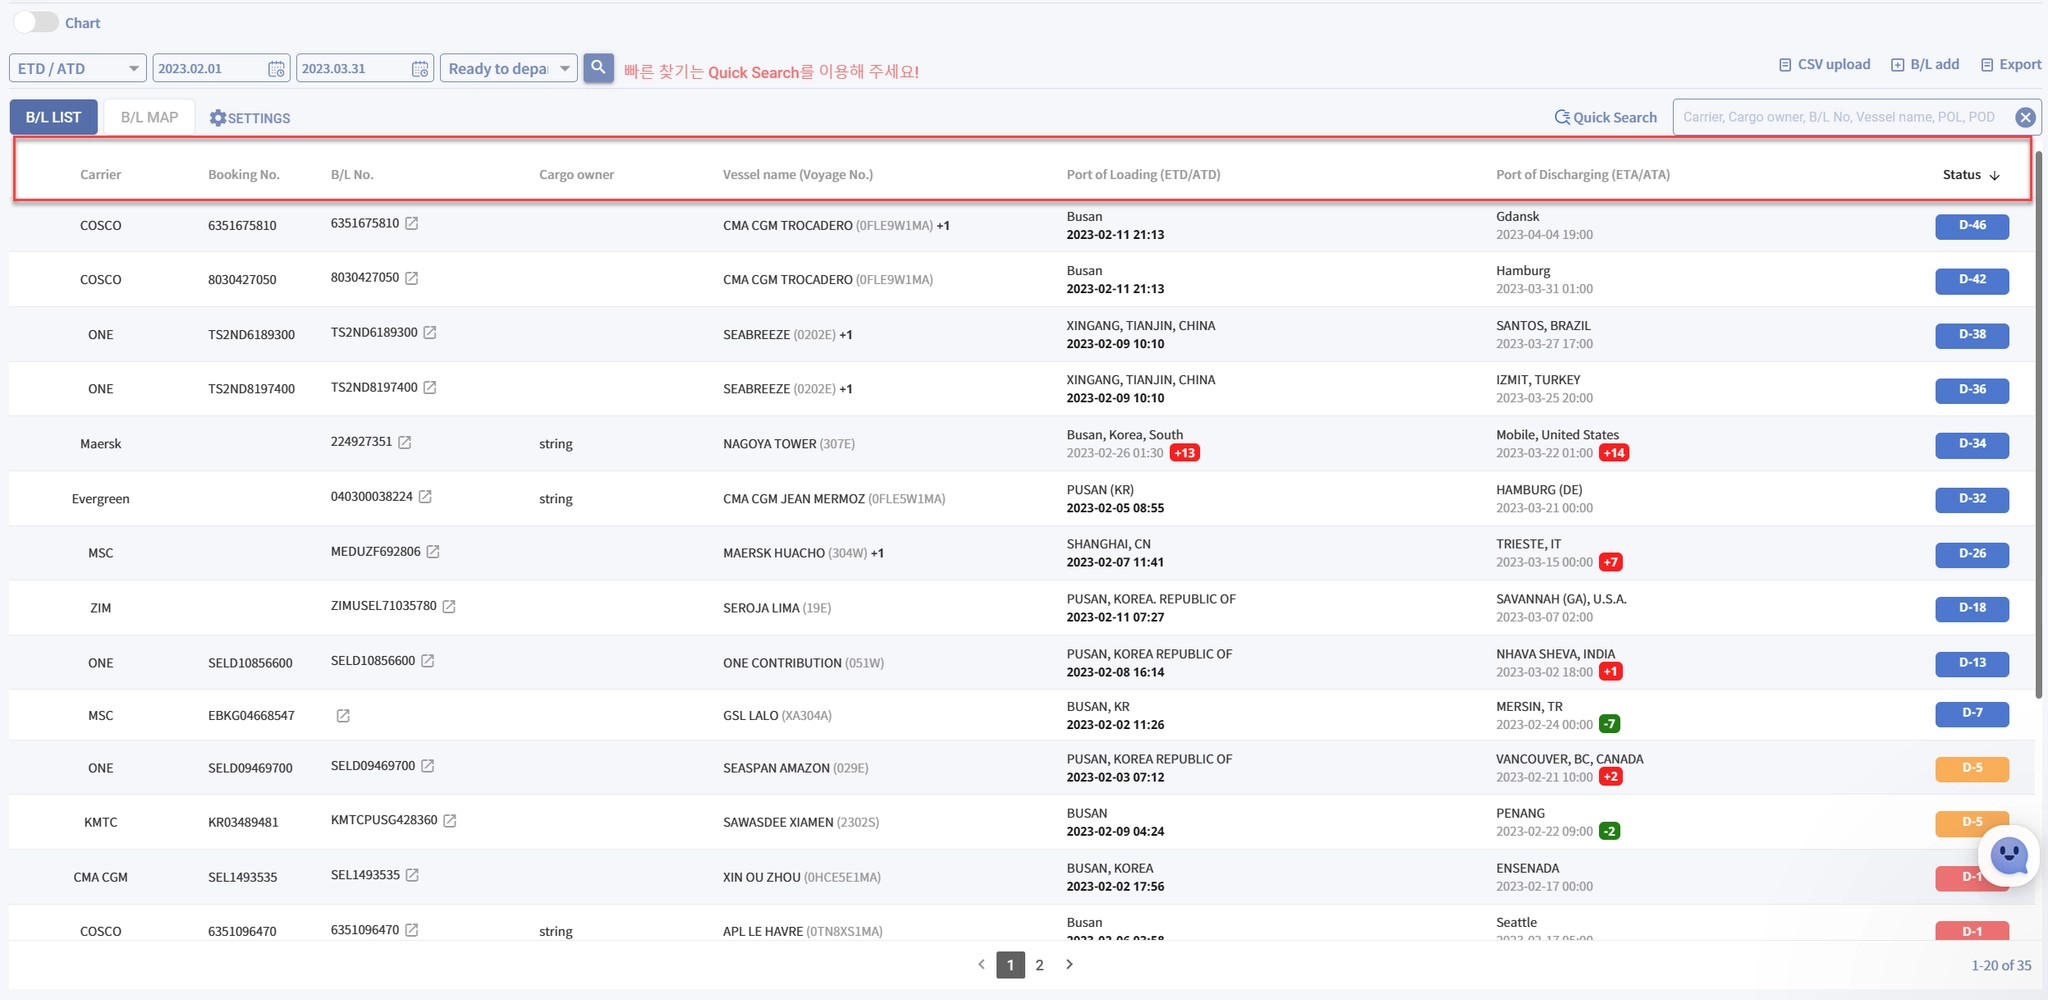
Enable custom columns that will be added to the Add B/L pop-up by ticking ‘Show this column’.
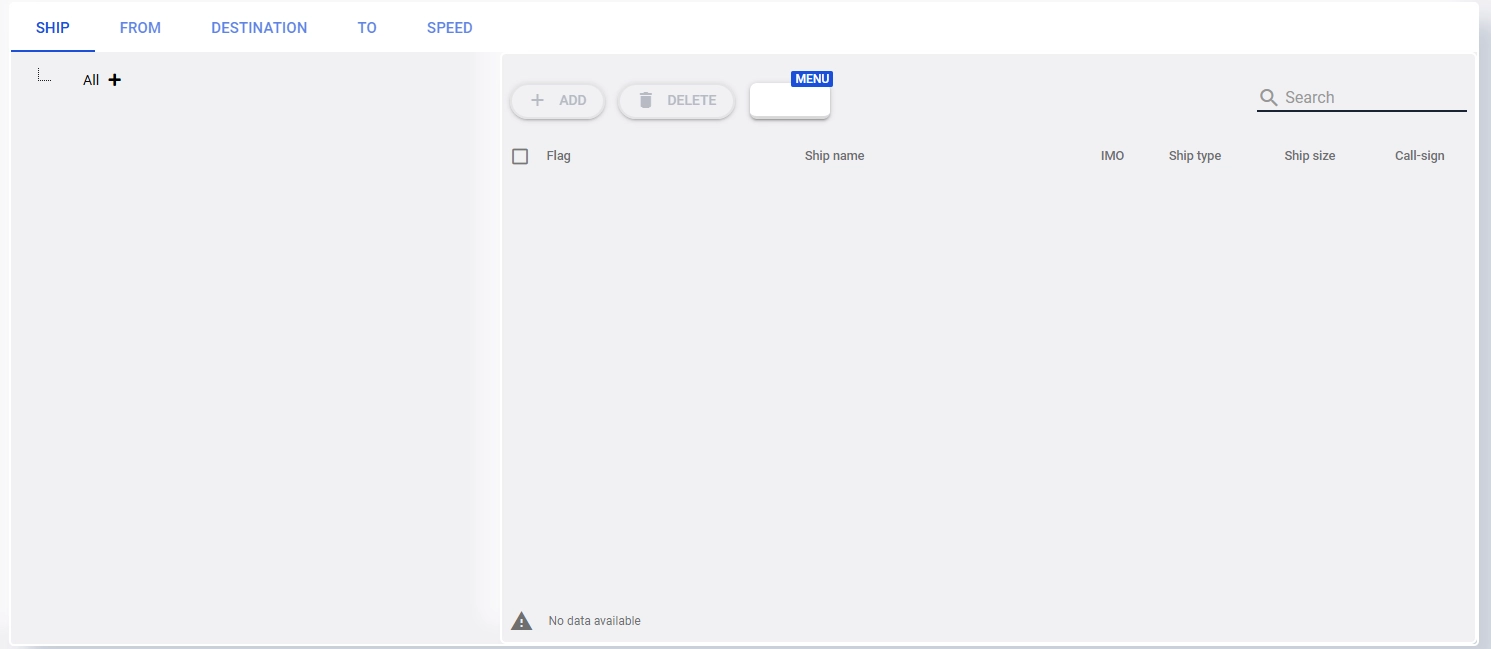
Ship Filter Settings
Create ship menu by listing the vessels managed by the Company. The ship menu can be used as a filter on the map.
1.
Click the ‘ Add’+ button to create a new menu.
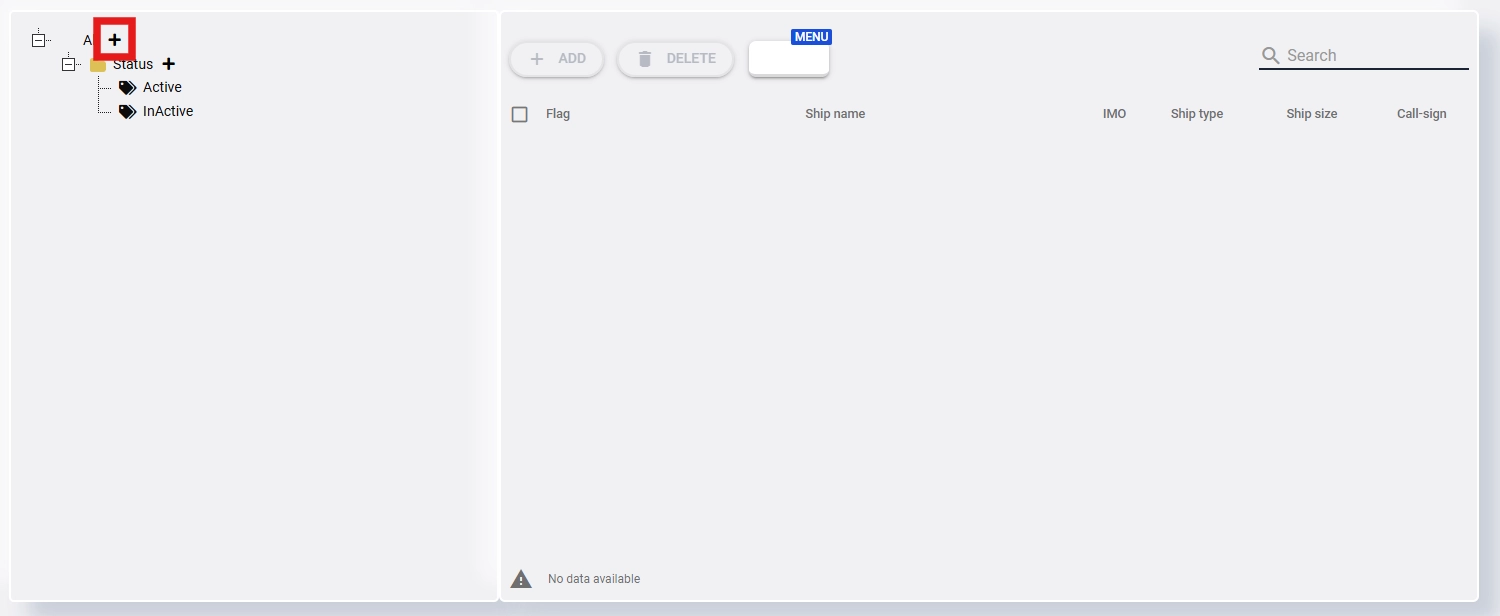

Note: The “status ship” menu cannot be edited or deleted.
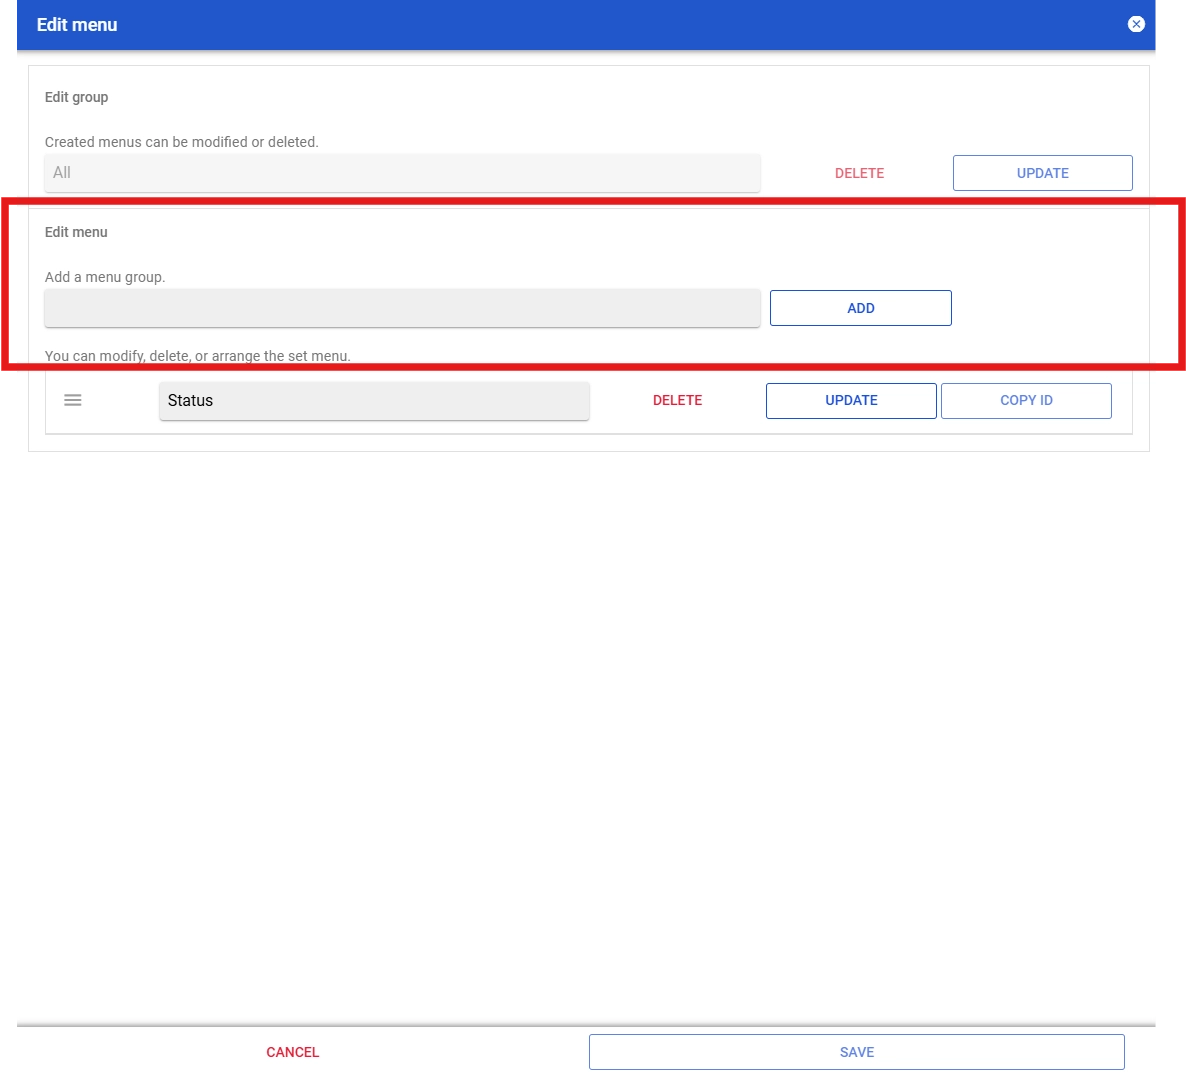
2.
Once the ‘Edit menu’ pop-up appears, input the group name and click on the ‘Add’ button
3.
Once ship menu is created, click on the ‘+’ button to create a new sub-menu group.
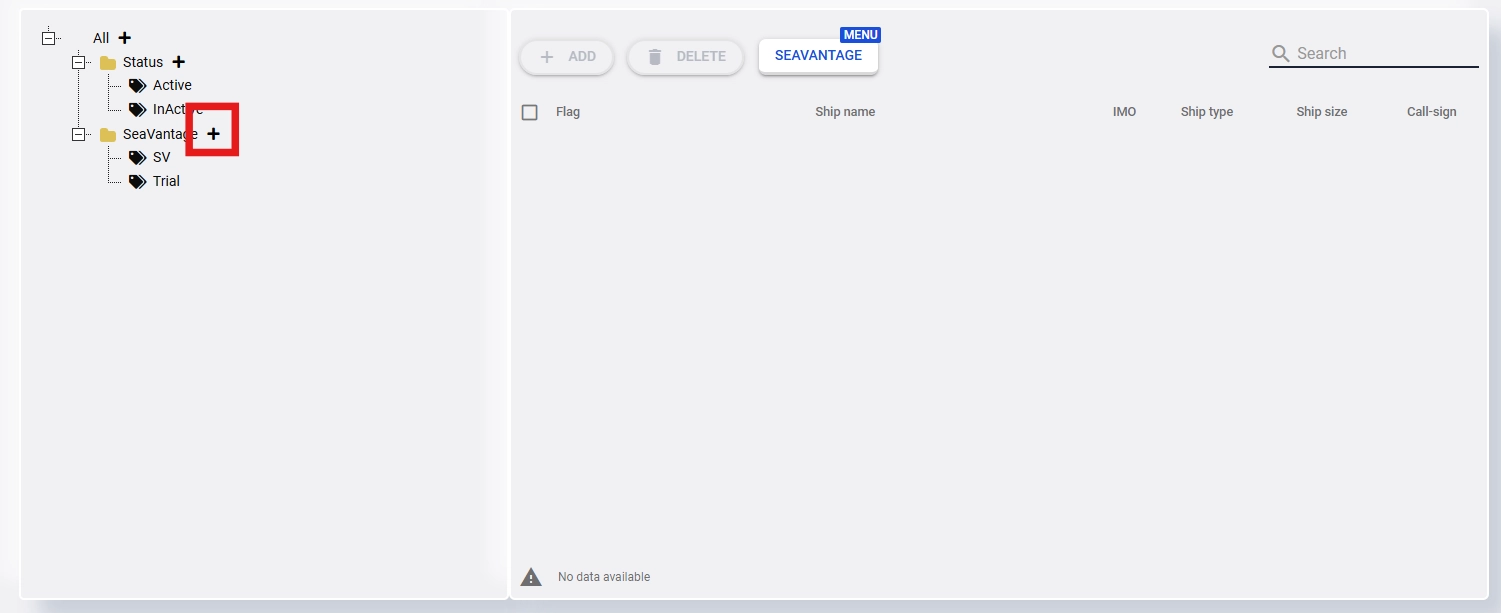
4.
Input the sub-menu group name and click on the ‘+’ button.

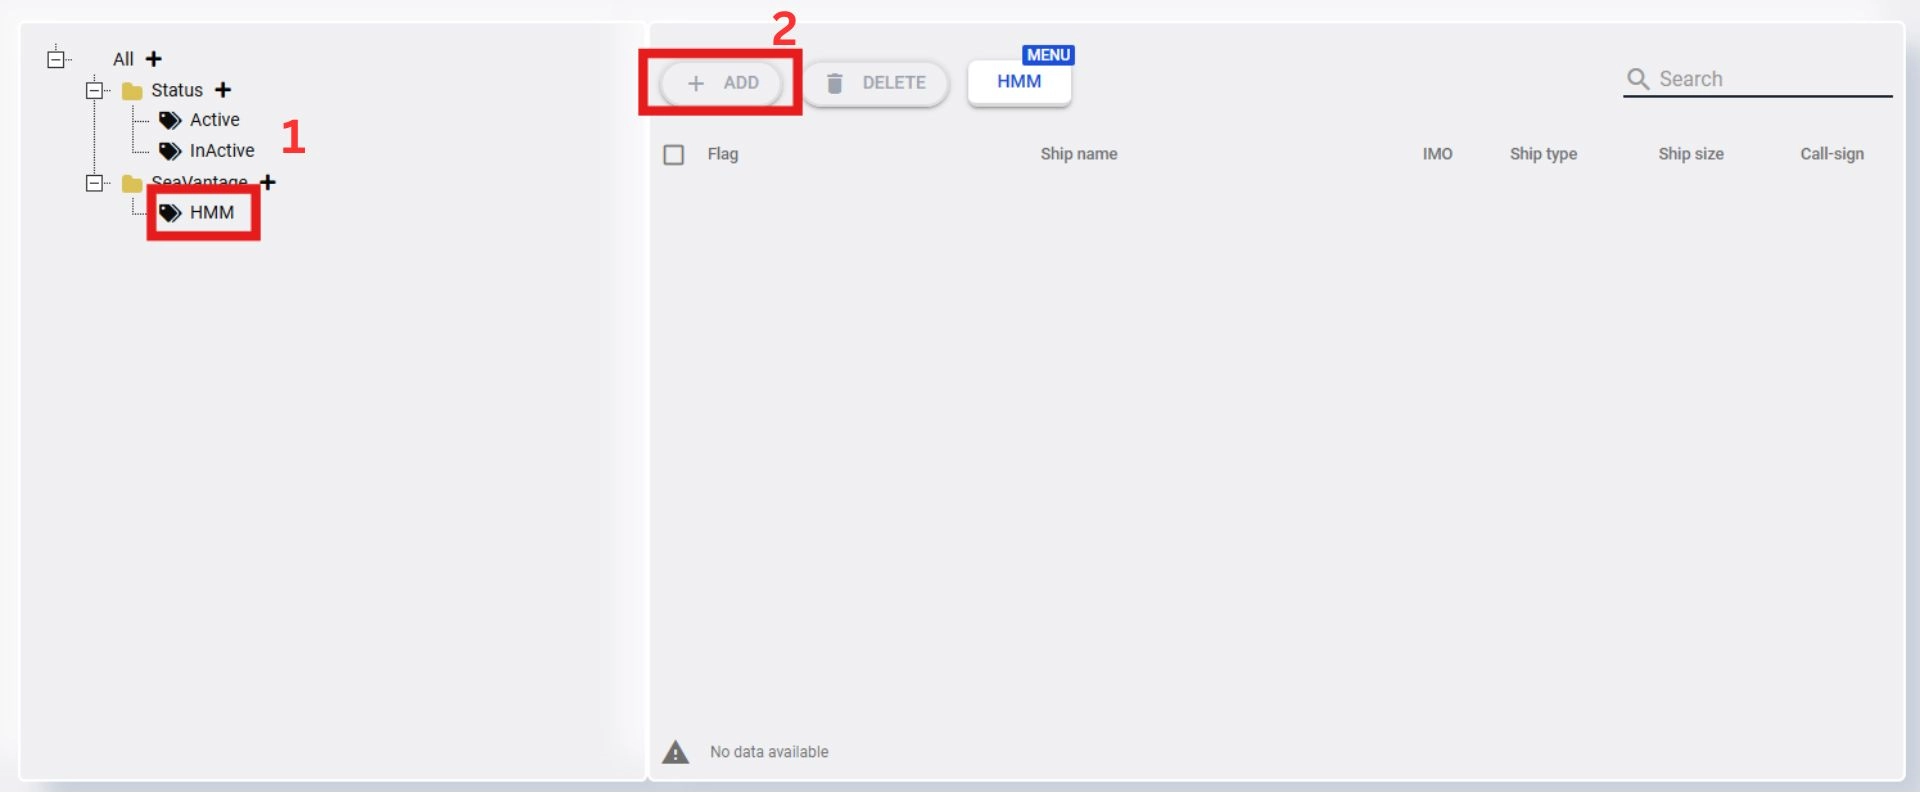
5.
Click on the newly created sub-menu and then click the ‘Add’ button to add a ship.
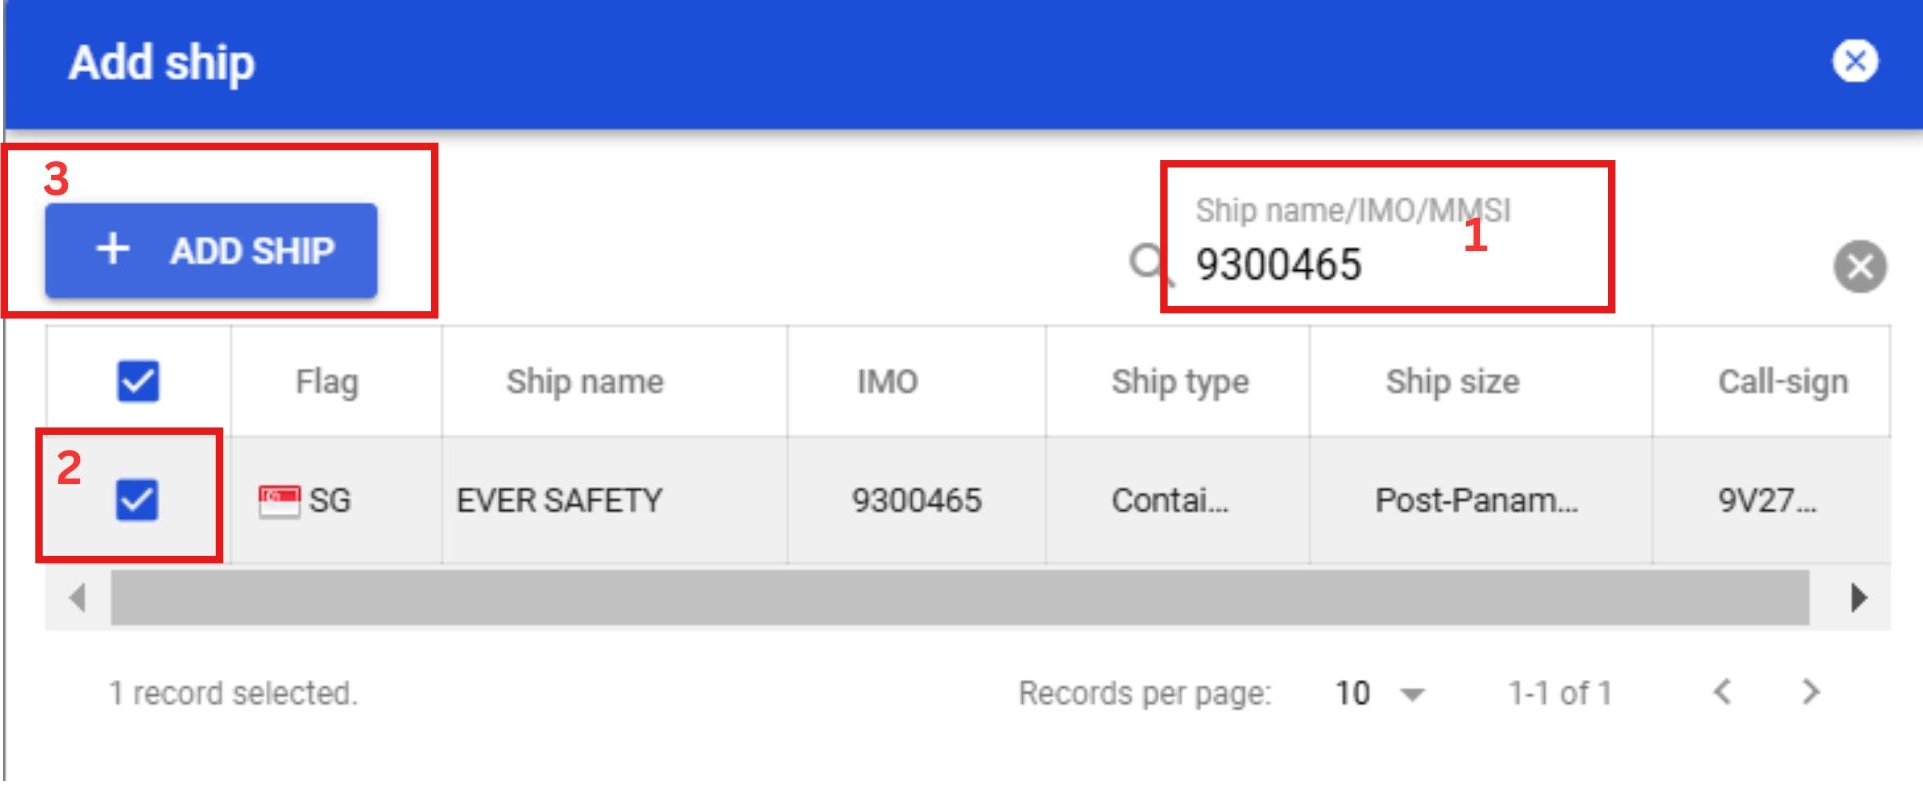
6.
Once the add ship pop-up appears, input either the ship name, IMO or MMSI on the search bar. Tick the ship you would like to add and then click the ‘Add Ship’ button.
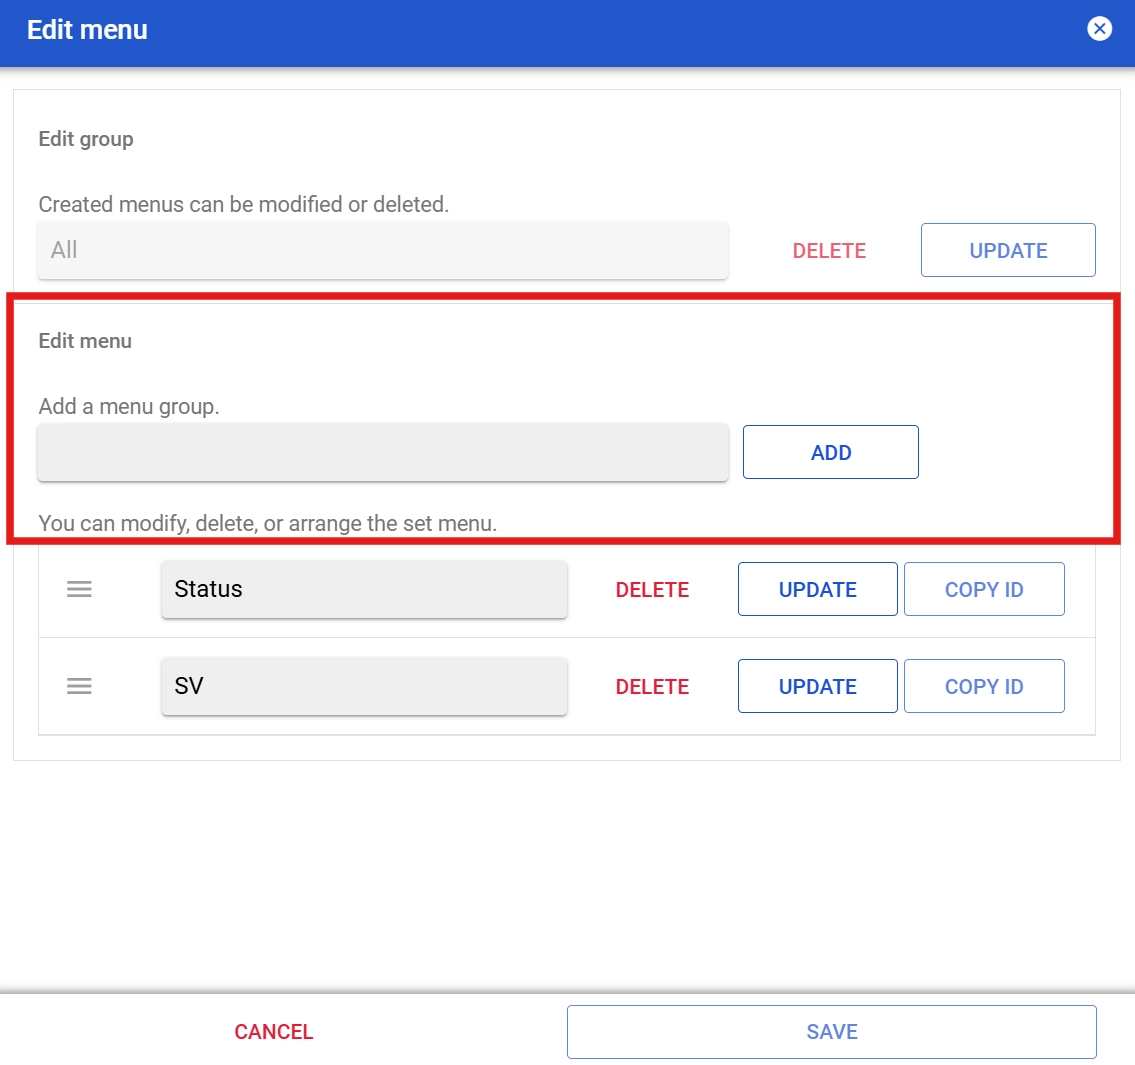
Port Filter Settings
Create a port menu by listing the ports that your company manages. The port menu can be used as a filter on the map.
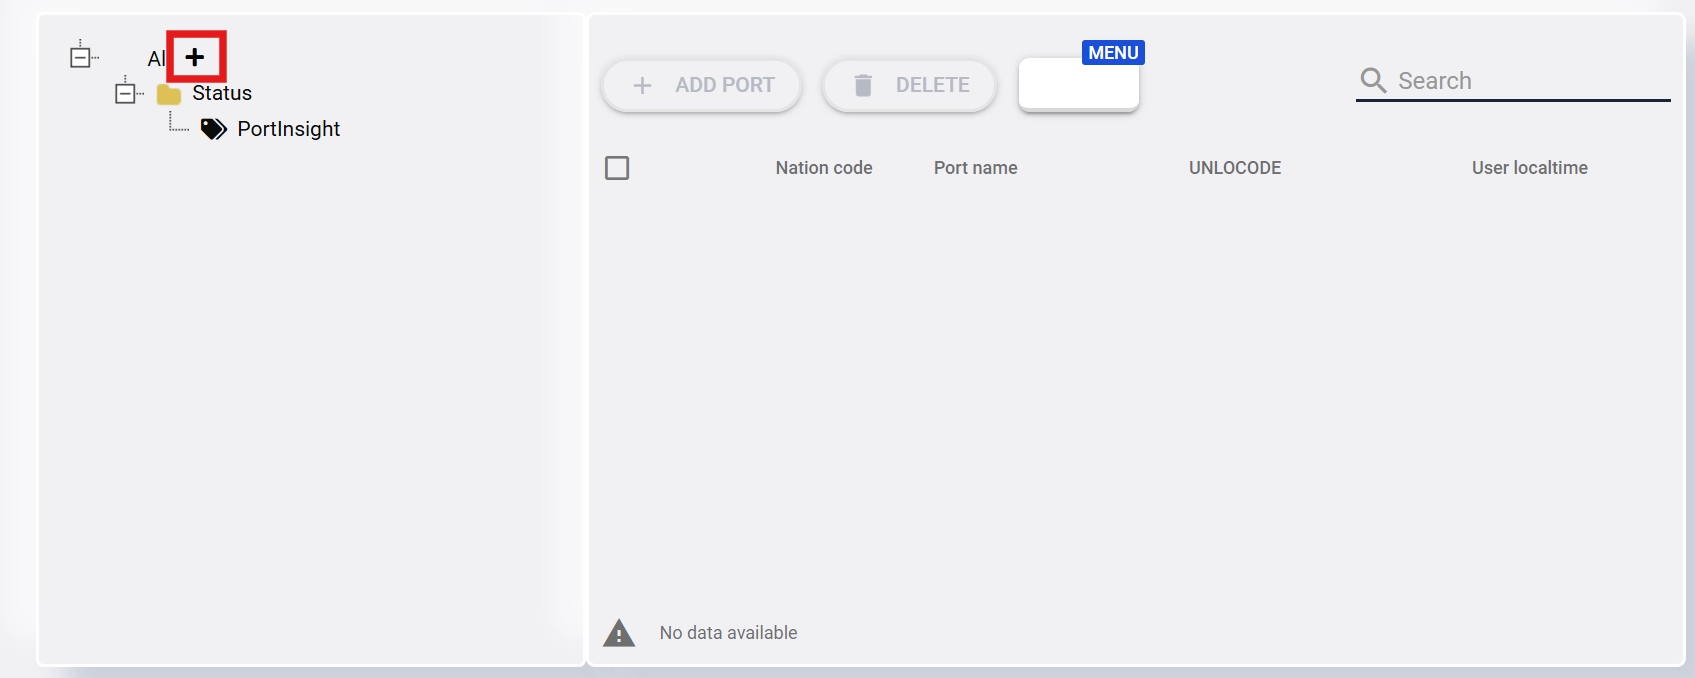
1.
Click the ‘Add +’ button to create a new menu group.
2.
Once the ‘Edit menu’ pop-up appears, input the group name and click on the ‘Add’ button
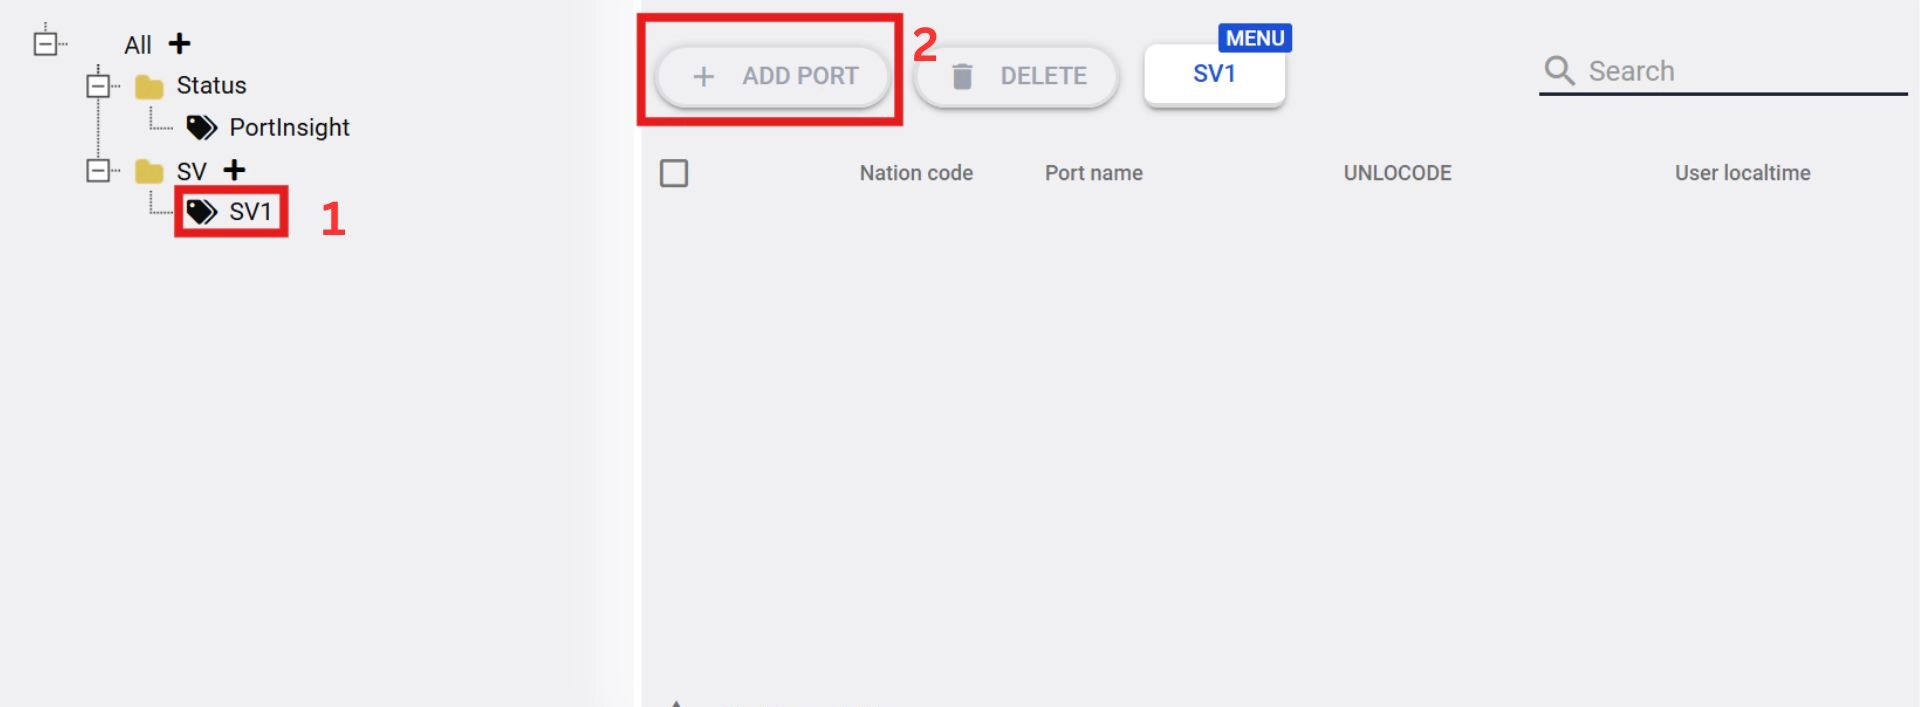
3.
Once port menu is created, click on the ‘+’ button to create a new sub-menu group.

4.
Input the sub-menu group name and click on the ‘+’ button.

5.
Click on the newly created sub-menu and then click the ‘Add’ button to add a port
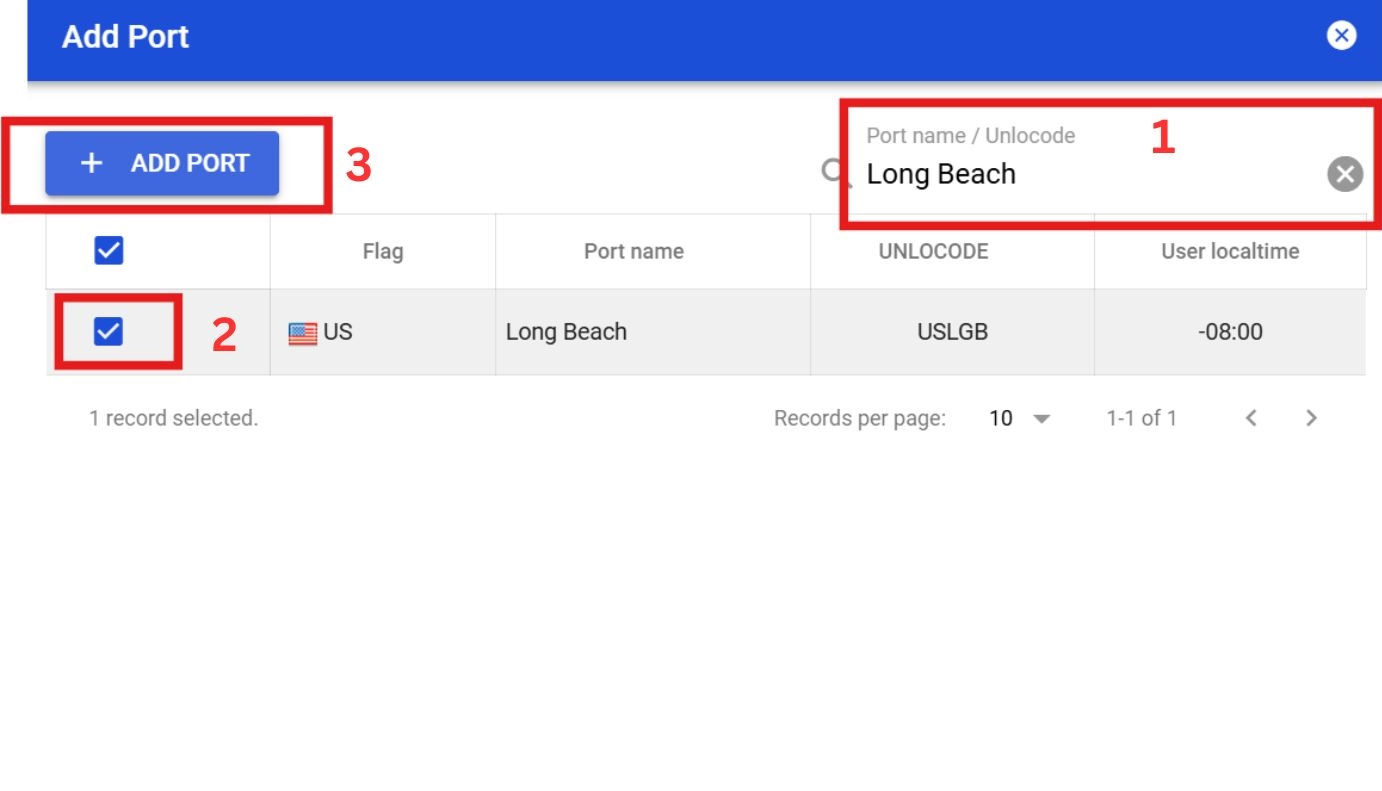
6.
Once the add port pop-up appears, input either the port name or UNLOCODE on the search bar. Tick the port you would like to add and then click the ‘Add Port’ button.
CII Setting
Zone
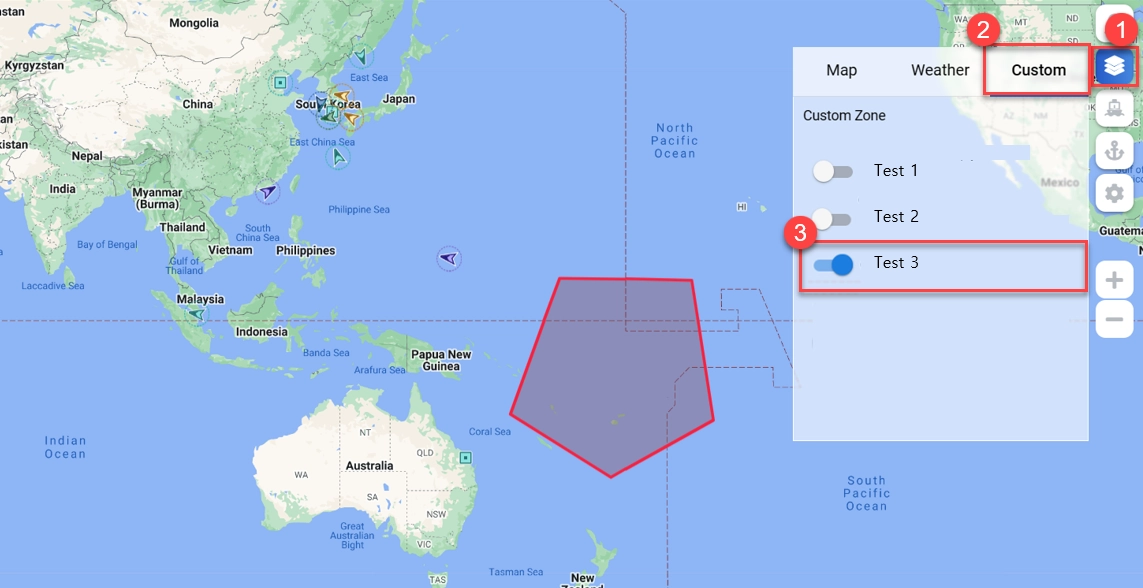
The Zones menu allows you to set up custom zones to display on the map.
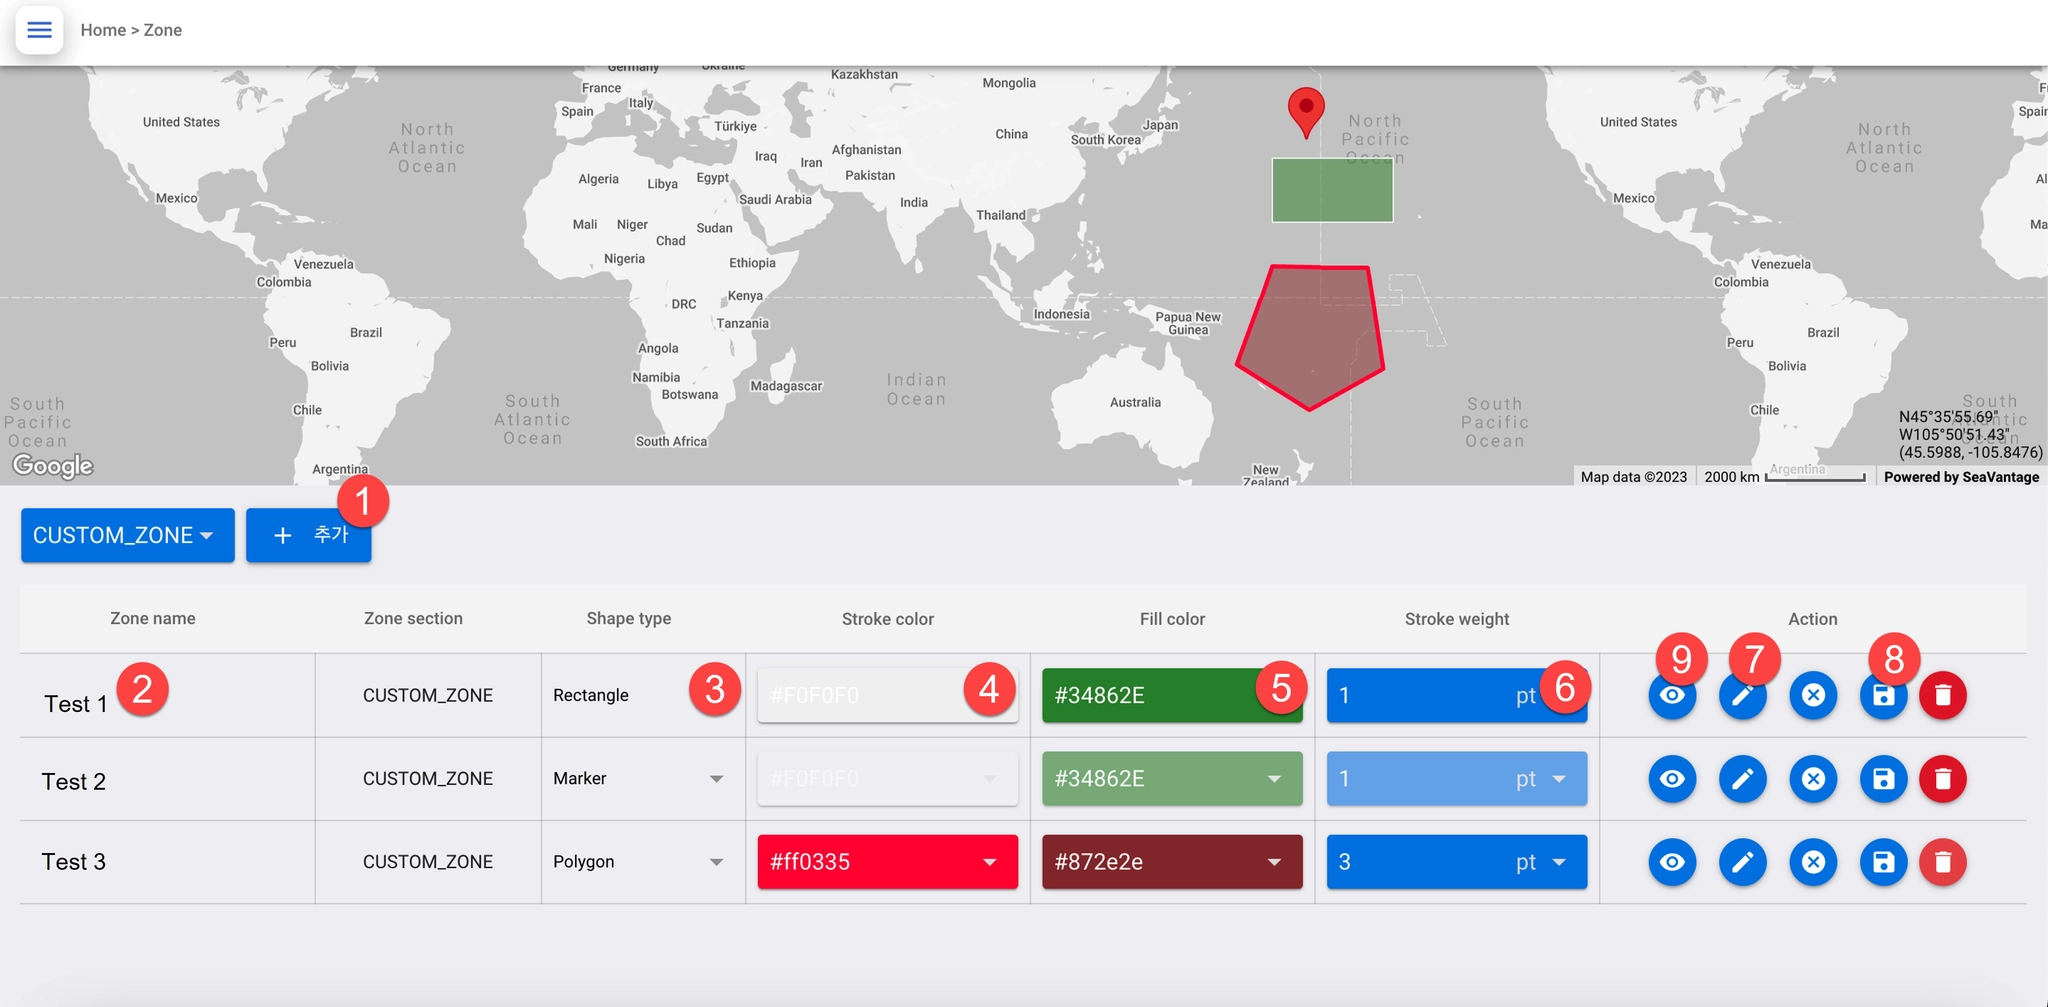
1.
Click the +Add button to create a custom zone.
2.
Enter a zone name.
3.
Set the shape type to display the area. (Circle, Marker, Polygon, Rectangle)
4.
Stroke Color
5.
Fill Color
6.
Stroke Weight (border thickness)
7.
Draw an area on the map (Polygon can be drawn by setting a parameter- clicking on multiple points)
8.
When you're finished assigning zones, click on the save button.
9.
Display your custom territory on the map.
To redraw an area, click the x in the Action tab, and to delete, click the trash can icon
The photo below shows how custom zones are displayed on the map.