

This screen provides an overview of the main components of the Ship Insight feature.
It consists of a left panel, a map view on the right, and a vessel information pop-up.
Ship
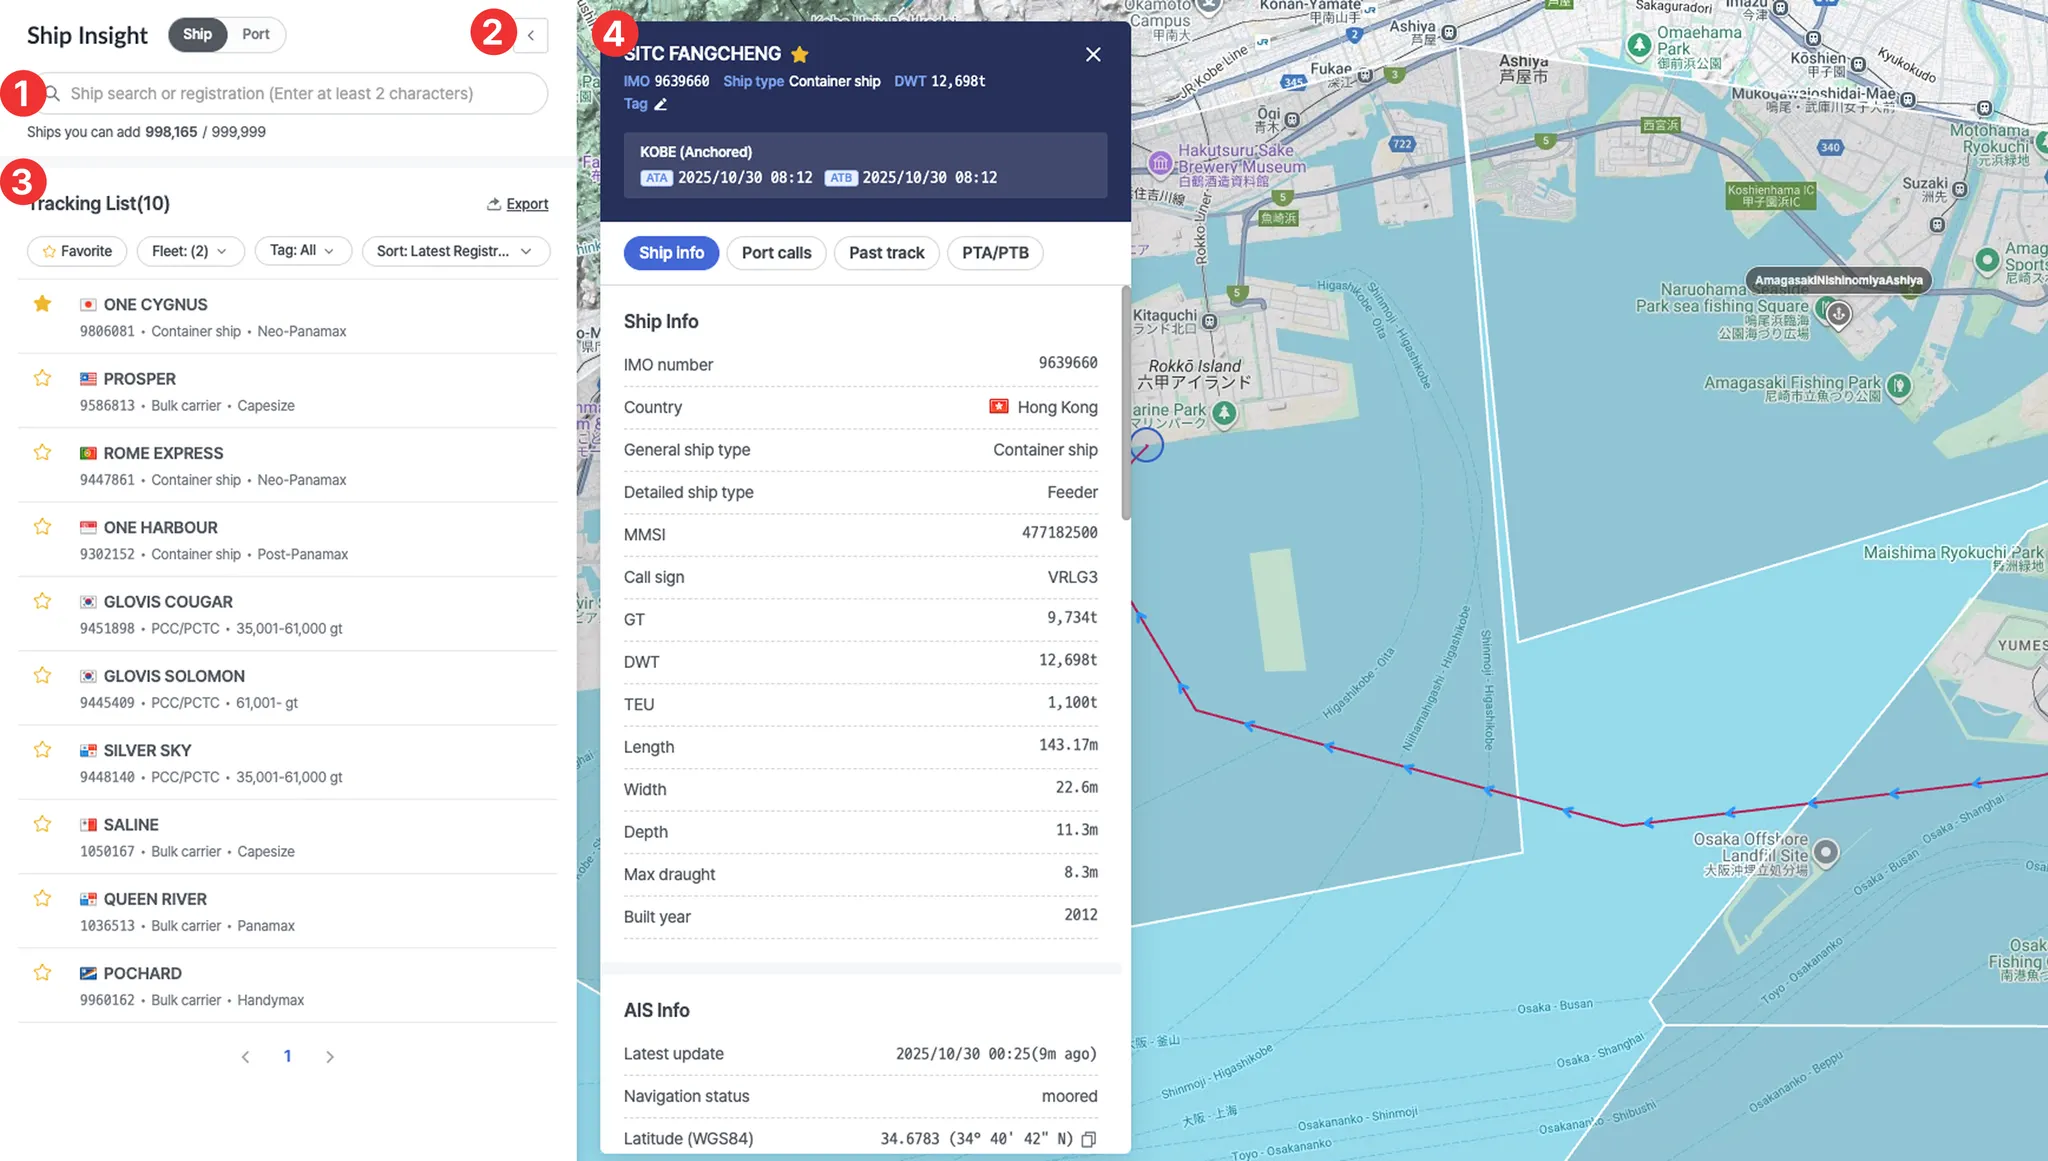
1. Search Bar
•
You can search for a vessel by name, IMO, or MMSI. After registration, you can view the vessel’s current location and detailed information.
•
Below the search bar, you can check the number of vessels registered in your workspace and the maximum number of vessels allowed.
◦
Example: “5 / 10” → 5 vessels registered out of a maximum of 10.
2. Hide / Show Panel
•
Collapse or expand the left panel.
•
When the panel is collapsed, the map view automatically expands to display a wider area.
3. Tracking List
•
Displays all vessels registered in the workspace. When you enter a search term or apply filter conditions, only the vessels matching the criteria will appear.
•
Export: You can export the current vessel list to an Excel file.
•
Filters:
◦
Favorite: View vessels marked as favorites.
◦
Fleet: View vessels by fleet category.
◦
Tag: View vessels by assigned tags.
◦
When Favorite, Fleet, and Tag are selected, vessels that meet all selected conditions will be displayed.
•
Sort: You can sort vessels by recent registration, vessel name, flag, or vessel type.
•
Clicking on a vessel item opens the vessel pop-up, where you can view its past route and projected route.
4. Vessel Pop-up
•
Displays detailed information about the vessel, including its past route, port calls, and PTA (Predictive Time of Arrival) data.
Port
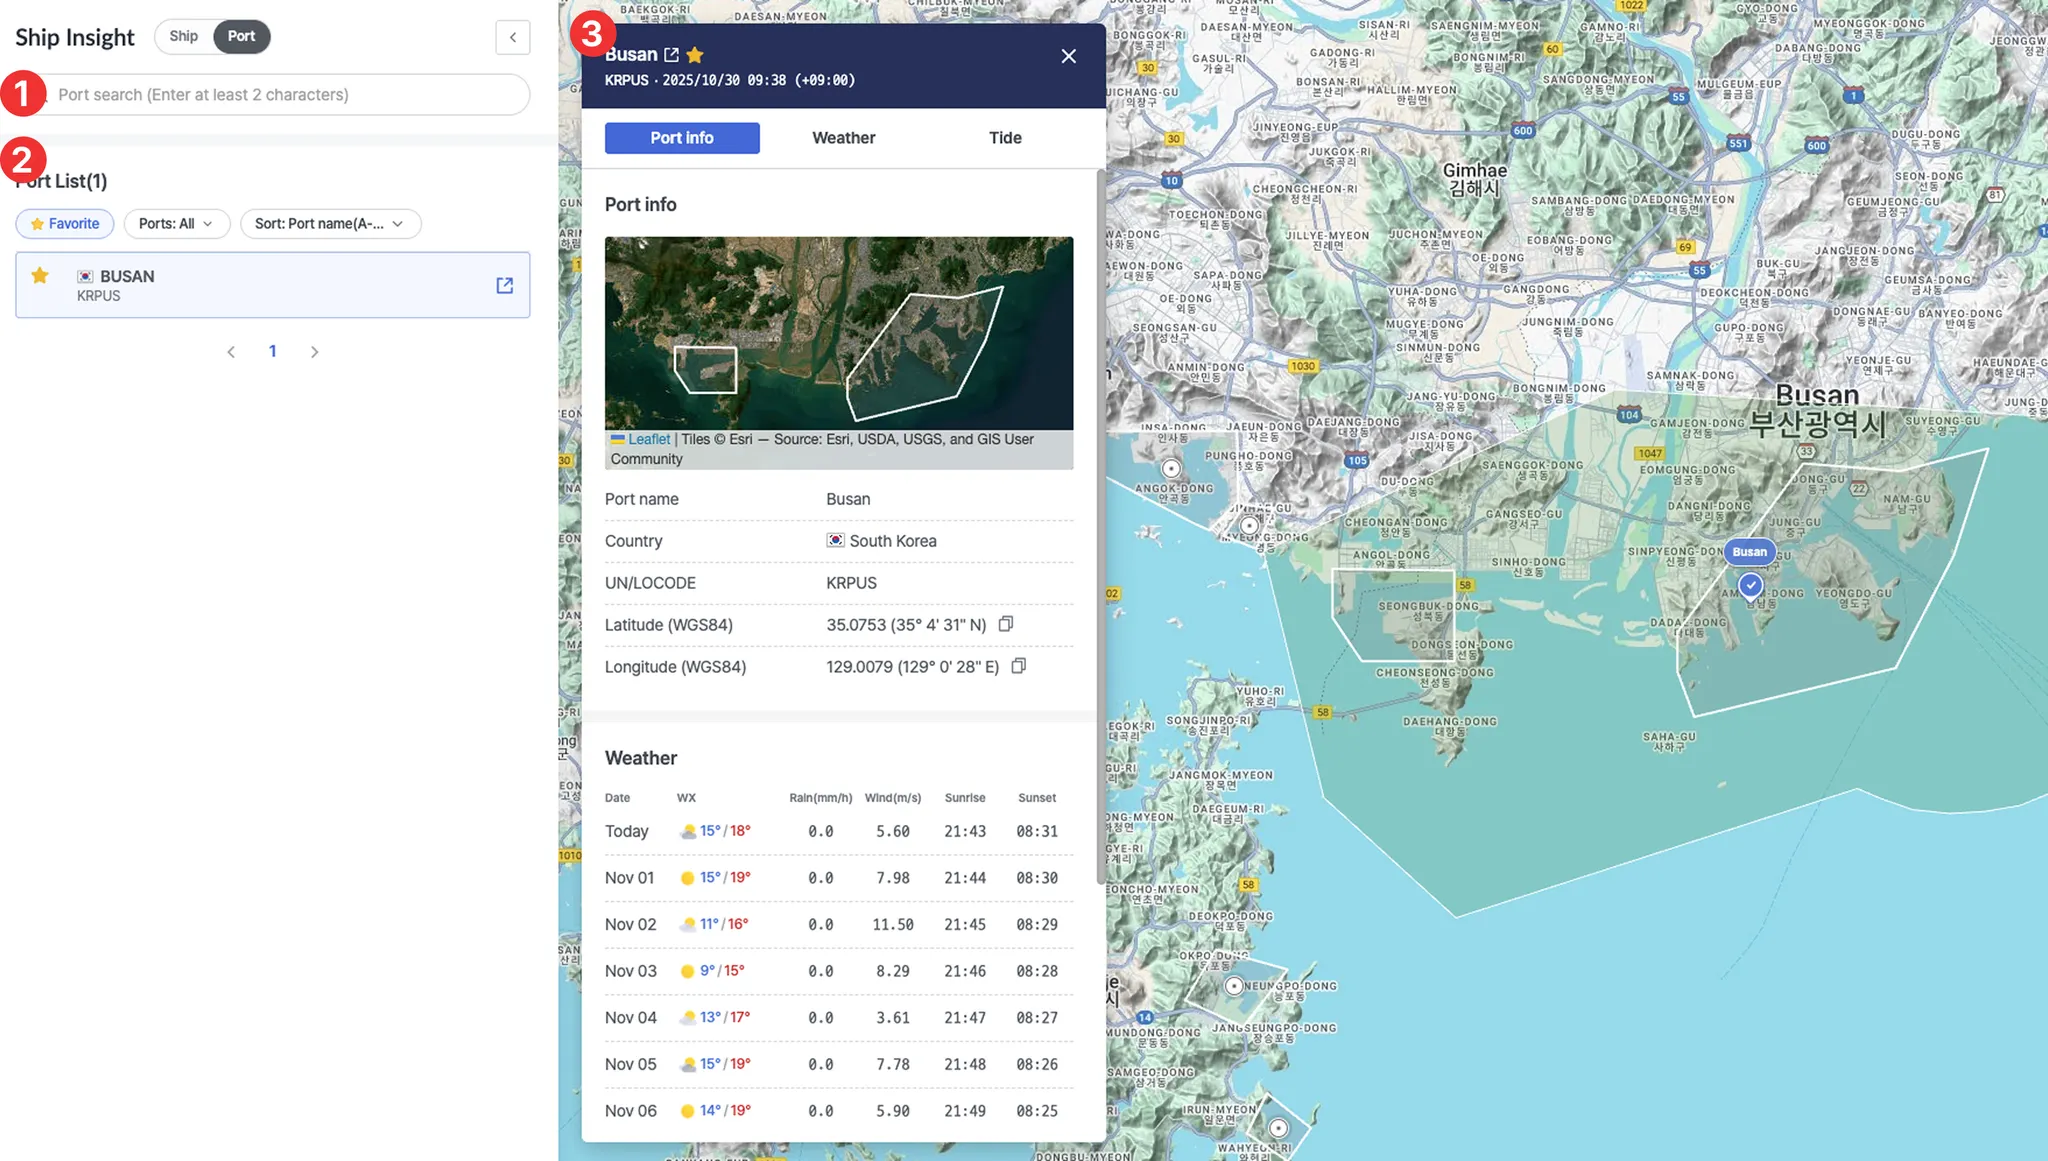
1. Search Bar
•
You can search for ports by port name, UN/LOCODE, or country name to view a list of matching ports.
2. Port List
•
Displays all available ports. When you enter a search term or apply filters, only the ports matching your criteria will be shown.
•
Filters:
◦
Favorite: View ports marked as favorites.
◦
Ports: View ports by group.
◦
When Favorite and Ports are selected, ports that meet both conditions will be displayed.
•
Sort: You can sort ports by recent registration, port name, or country.
•
Clicking a port item opens the port pop-up, where you can view the port area and related details.
•
Clicking the button to the right of the port name redirects you to the Port Insight page.

3. Port Pop-up
•
Displays basic information about the port, including weather and tide conditions.
Map

1. Port Markers
•
Zoom in on the map to view port areas and boundaries.
•
Color Indicators:

2. Route Display
•
Red line: Past vessel route
•
Dotted line: Predicted sailing route
•
Arrow icon: Current vessel position
◦
Status Indicators:

◦
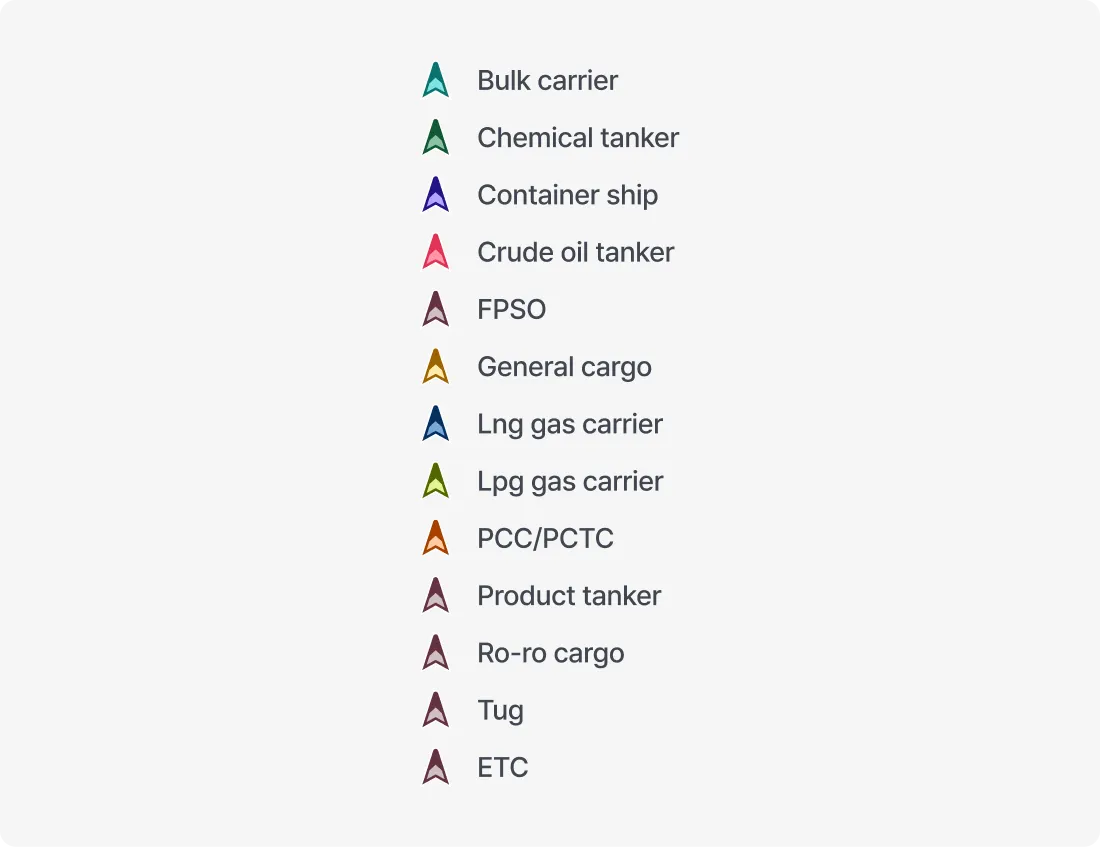
Vessel Type Colors:
3. Layer Settings
•
Configure map style, area visibility, and label display options.
4. Tool Settings
•
Use tools for full-screen view, screenshot capture, distance measurement, and map refresh.
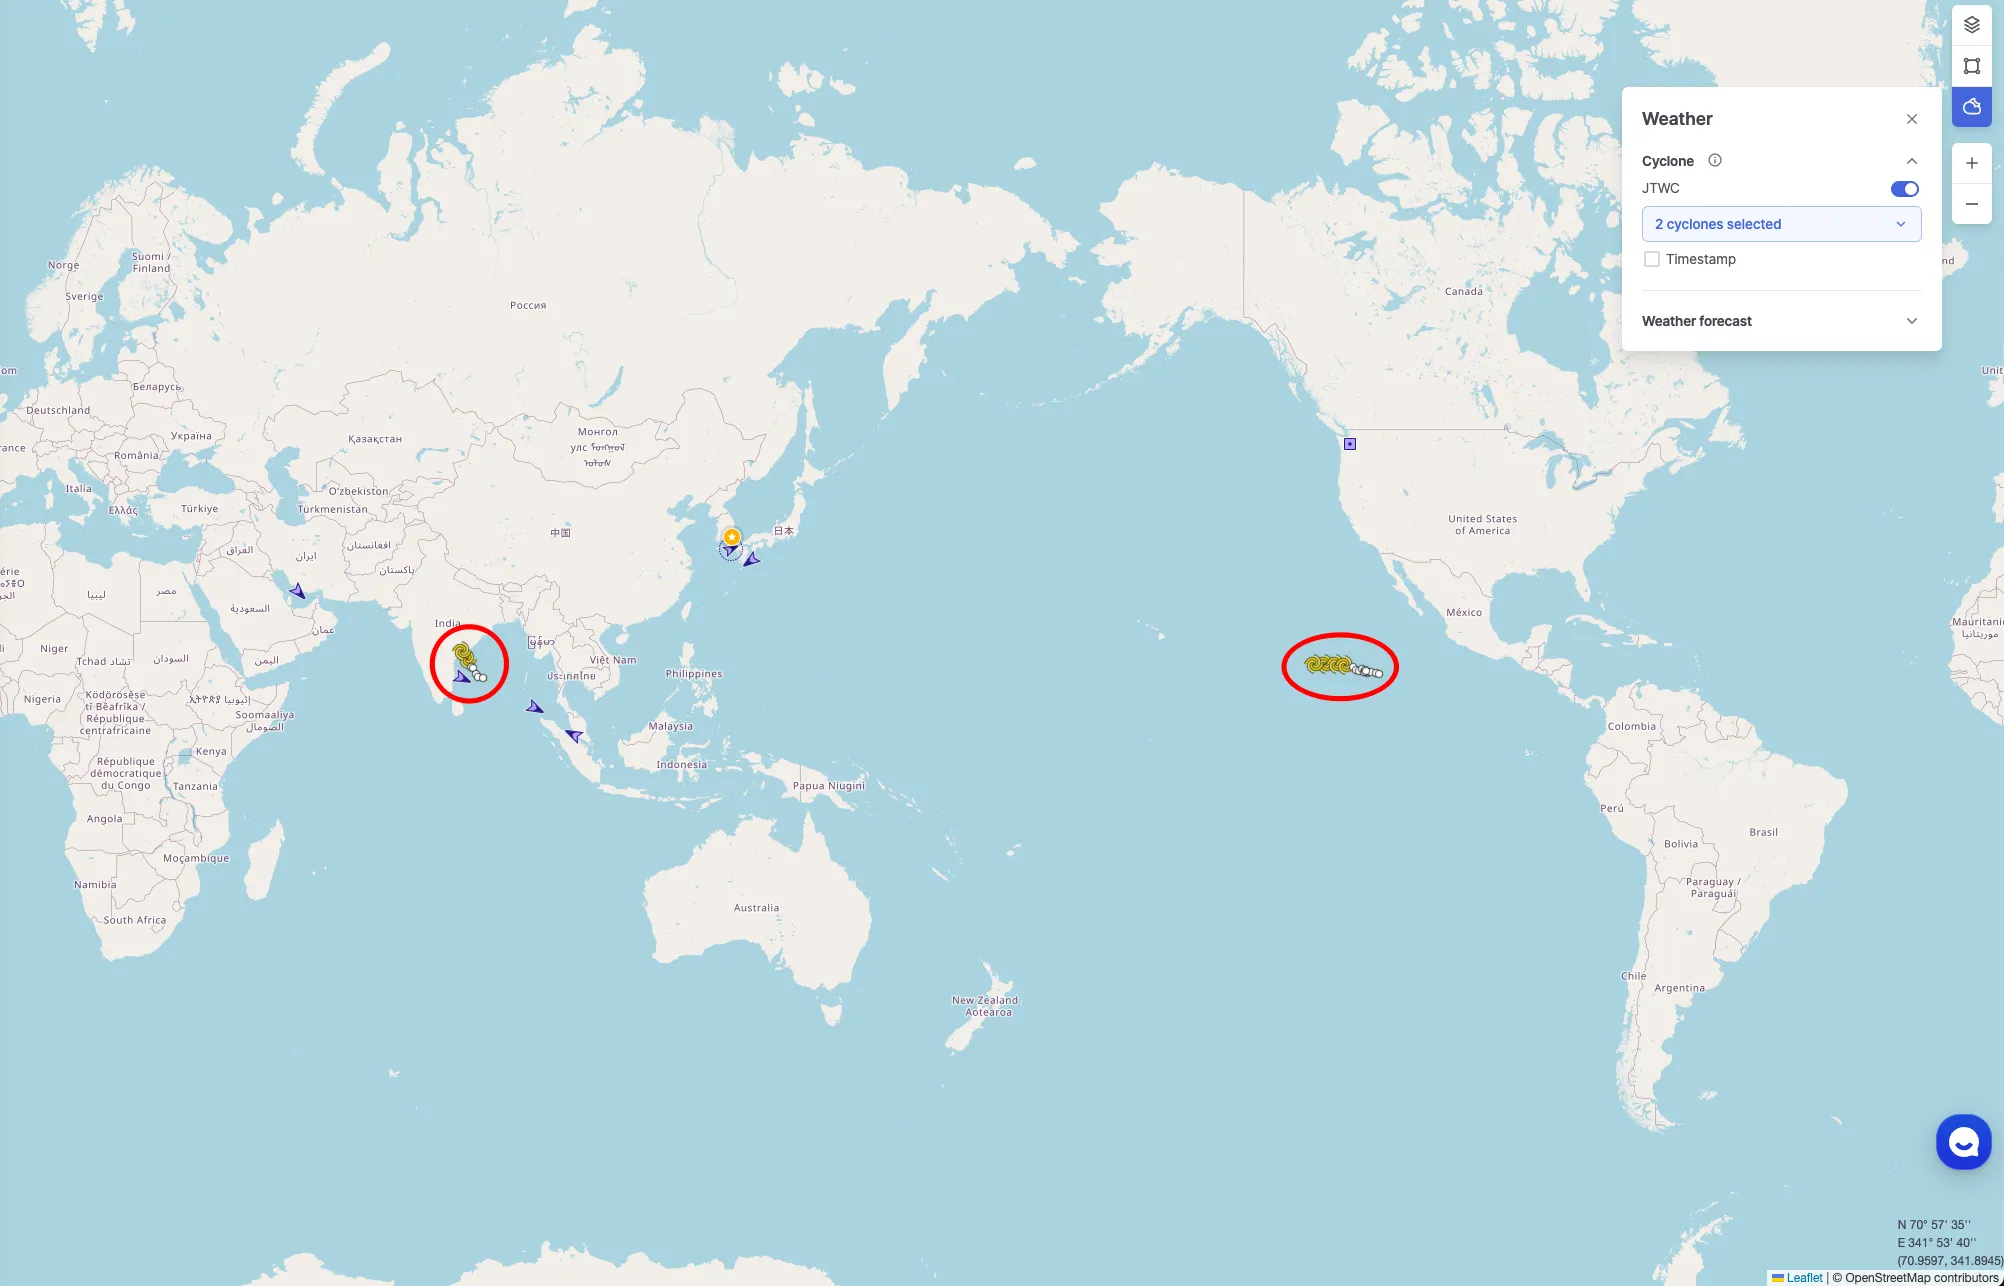
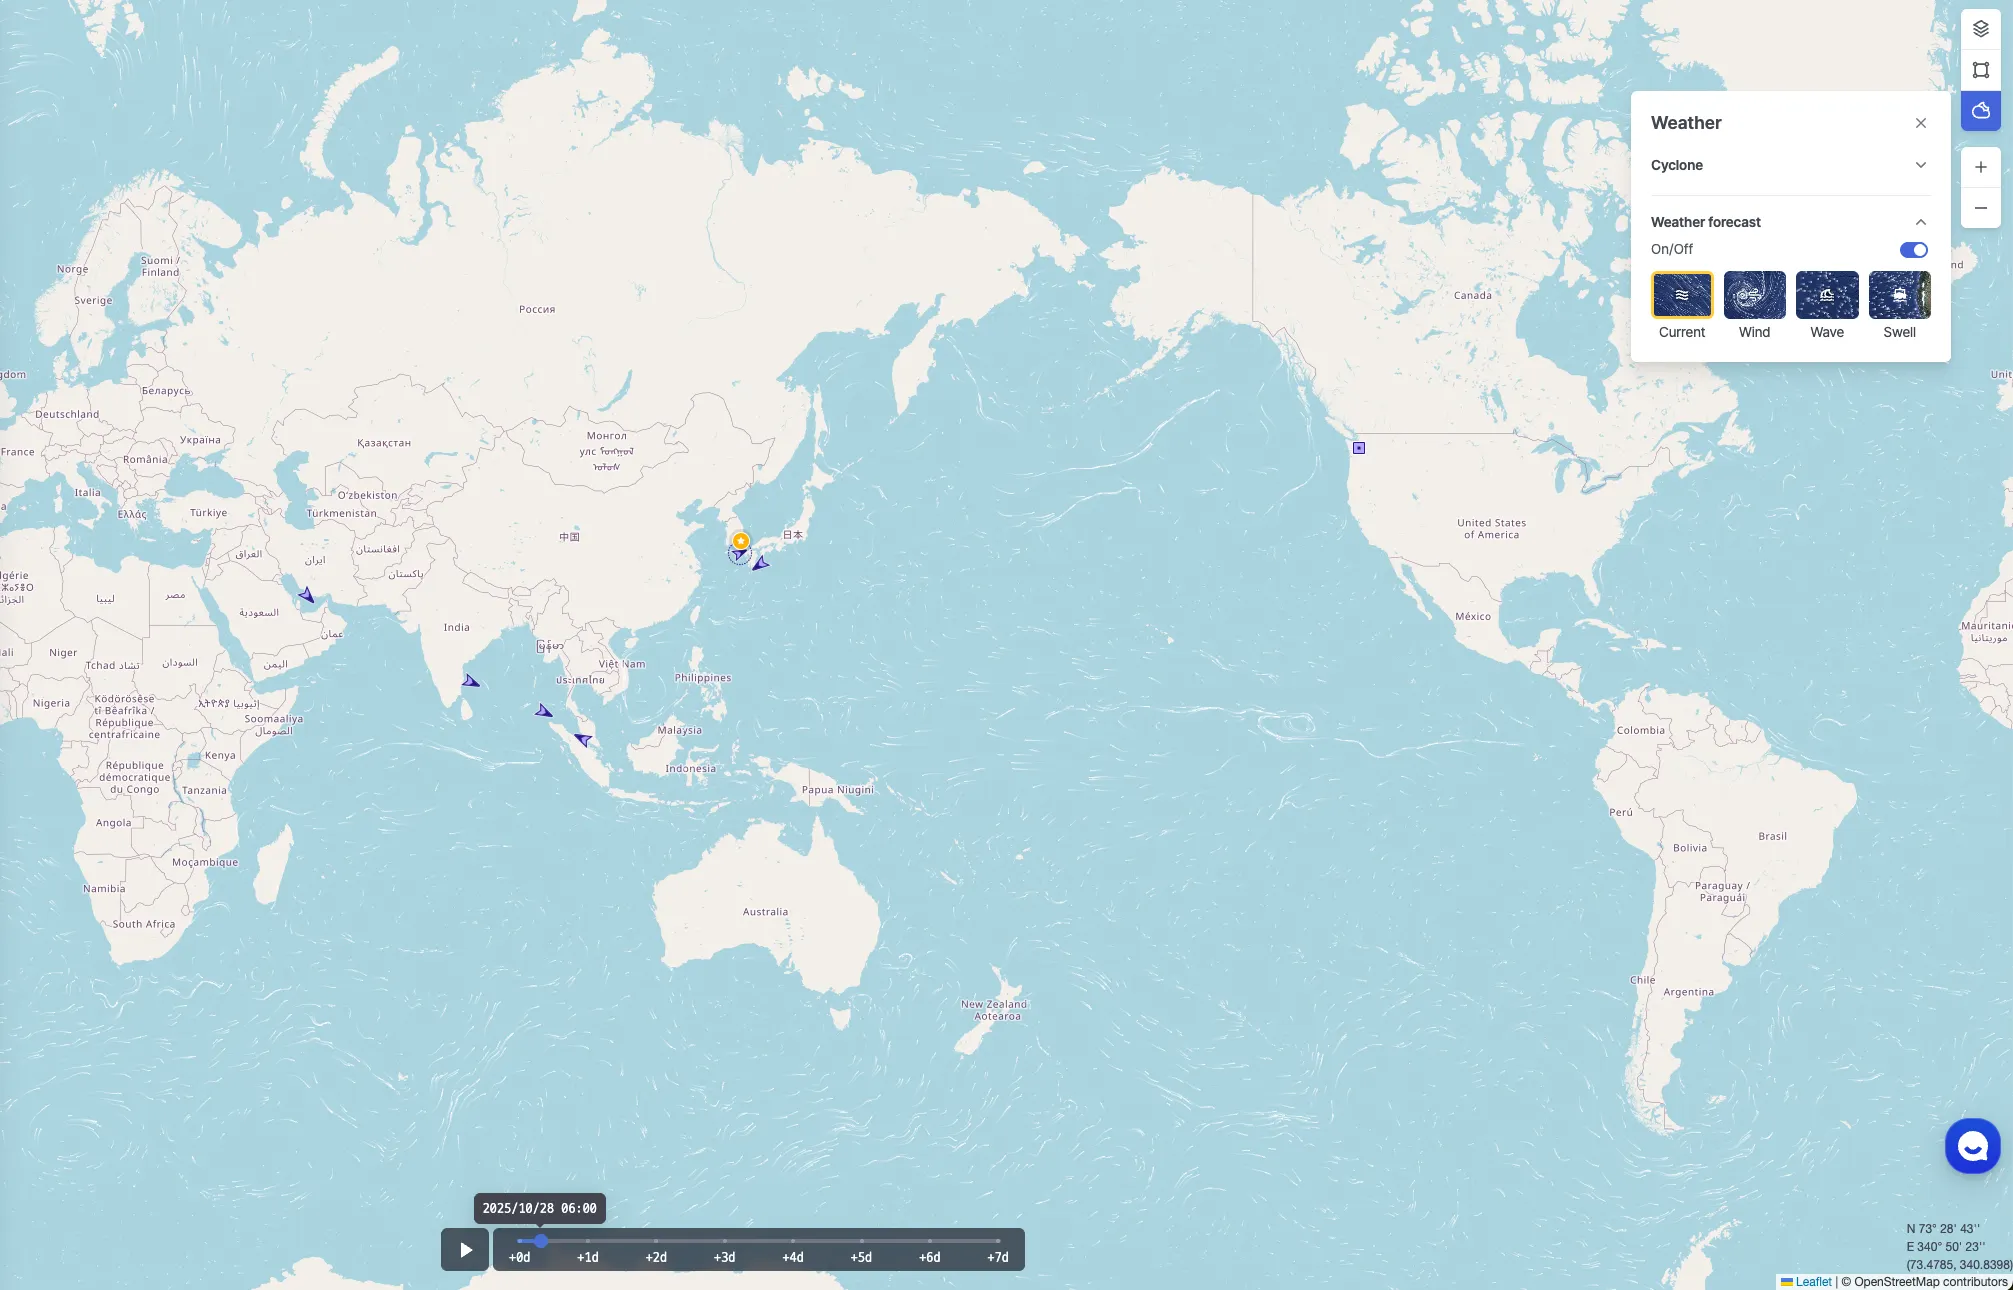
5. Weather Settings
•
View typhoon tracking and weather forecasts on the map.
6. Zoom In / Out
•
Adjust the map viewing range to zoom in or out.
7. Coordinates Display
•
Check the latitude and longitude of the cursor’s current position on the map.
8. Live Chat
•
Contact the Customer Experience (CX) Manager in real time for inquiries or assistance.